Your stuff looks amazing, Jago! You don’t see so tastefully designed DIY often, you sure have an eye for design and construction! I was wondering if you have more drawings of your enclosures, I am interested in the inner/outer dimensions of those boxes because they sure look good on your shelf. What is the font name you used for the back panel labels? Thanks!
Hi, thanks for your appreciation, the outer dimensions of my racks are 31.5 x 38 cm. The inner measures, therefore, 27.7 x 34.2 cm. The height is 8 cm. 1.9 mm MDF. The inner cover has 1 mm tolerance on all sides 27.5 x 34. The font I used for all texts is Eurostile Extended 2.
Bye, Jago
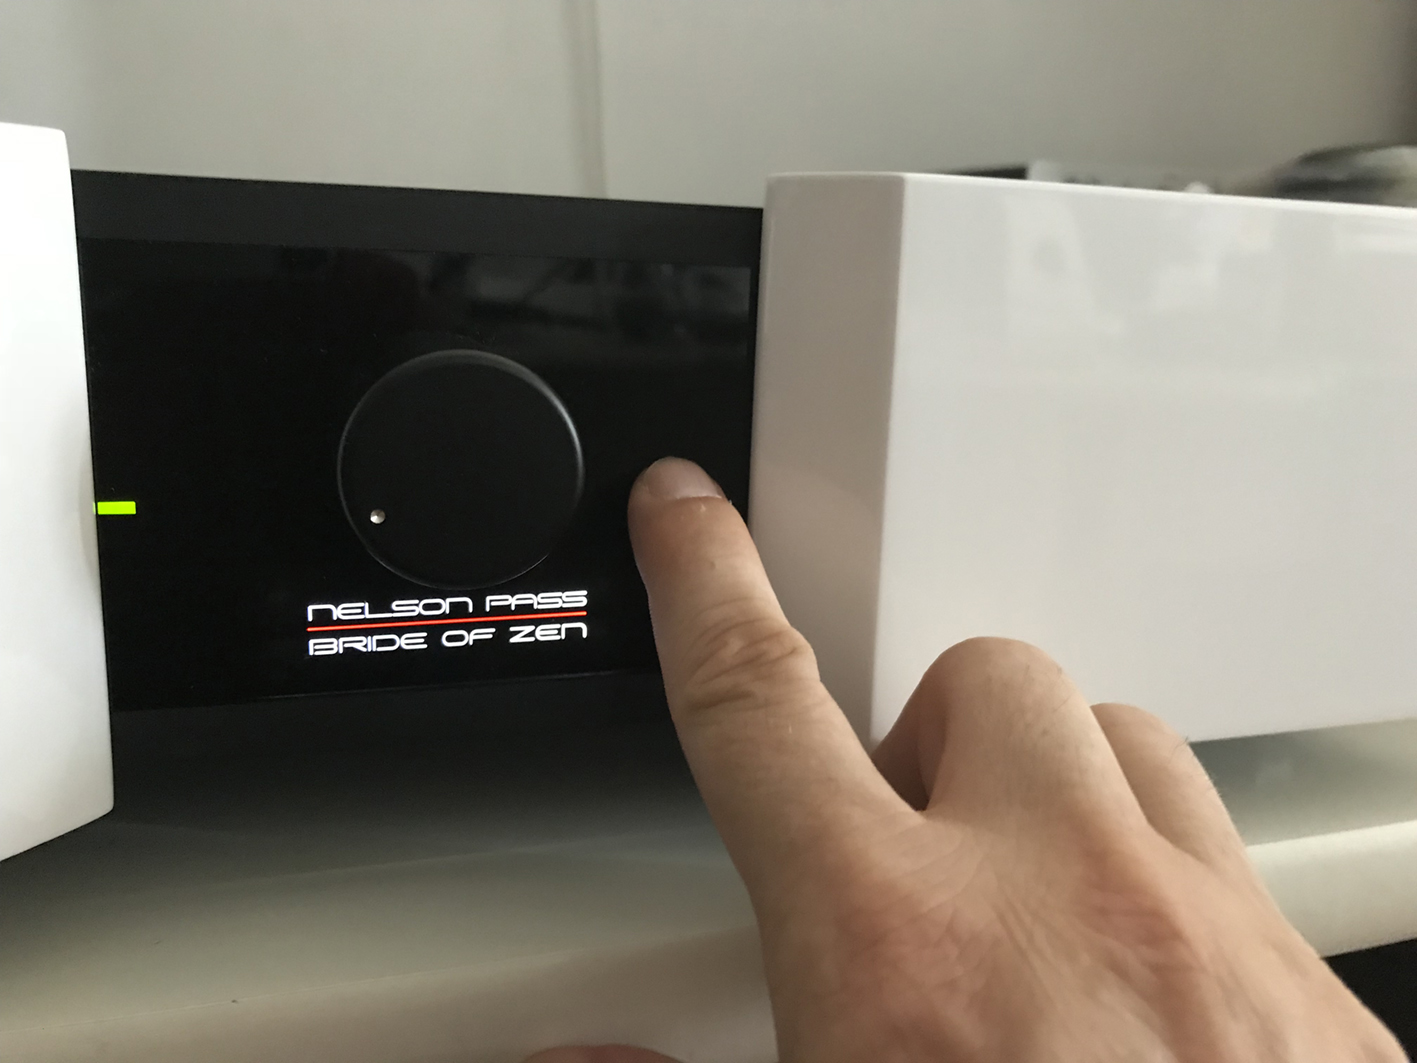
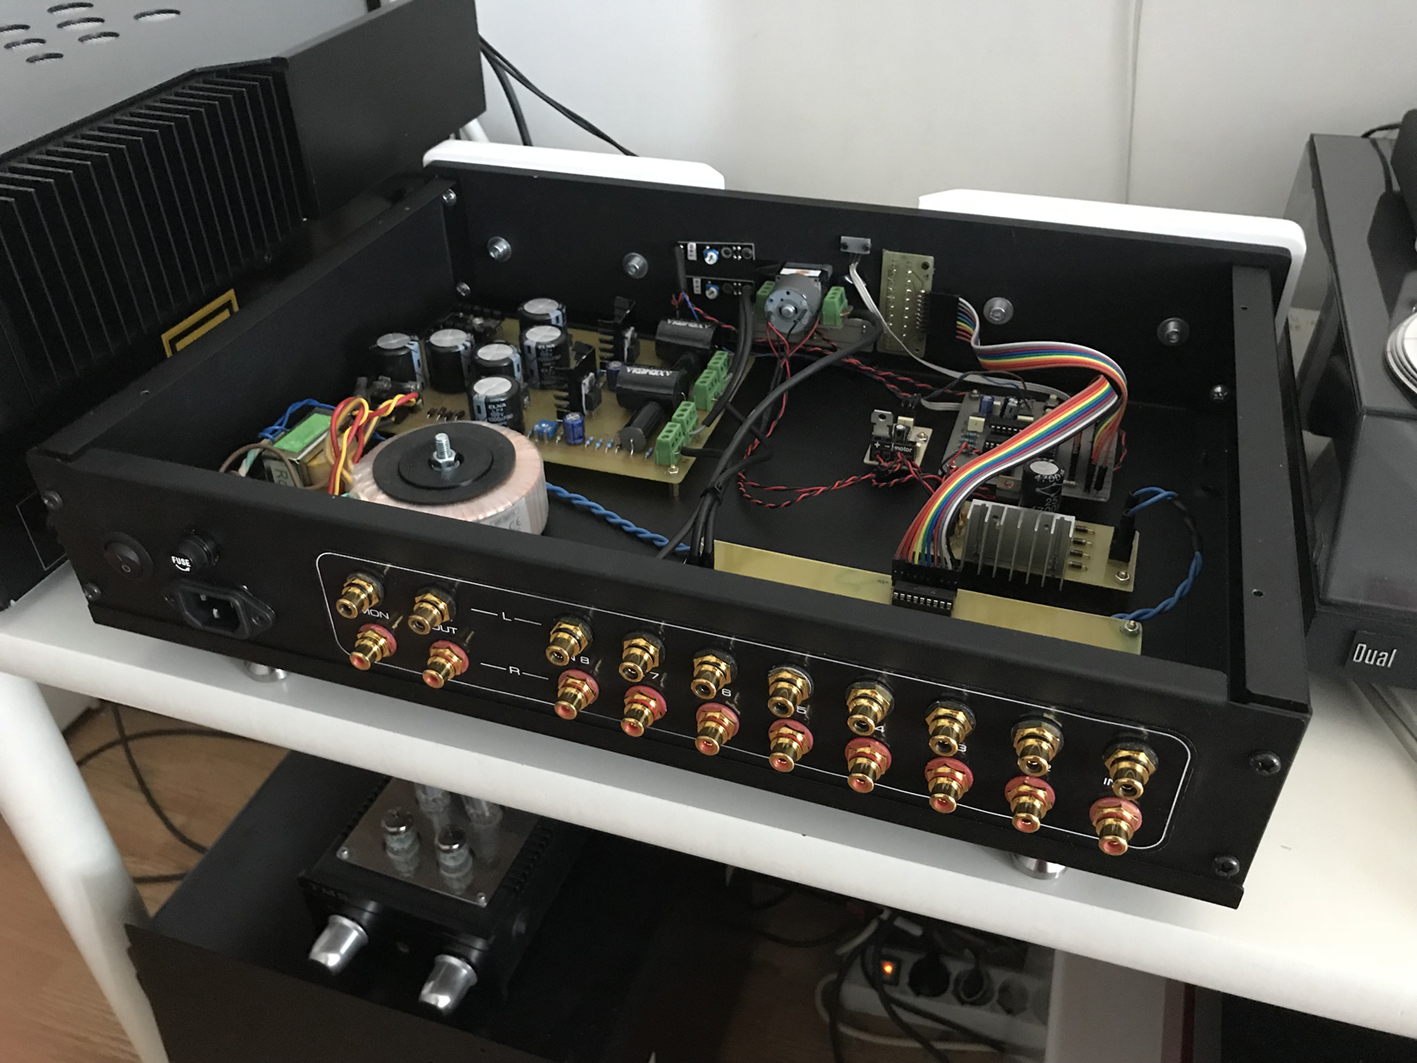
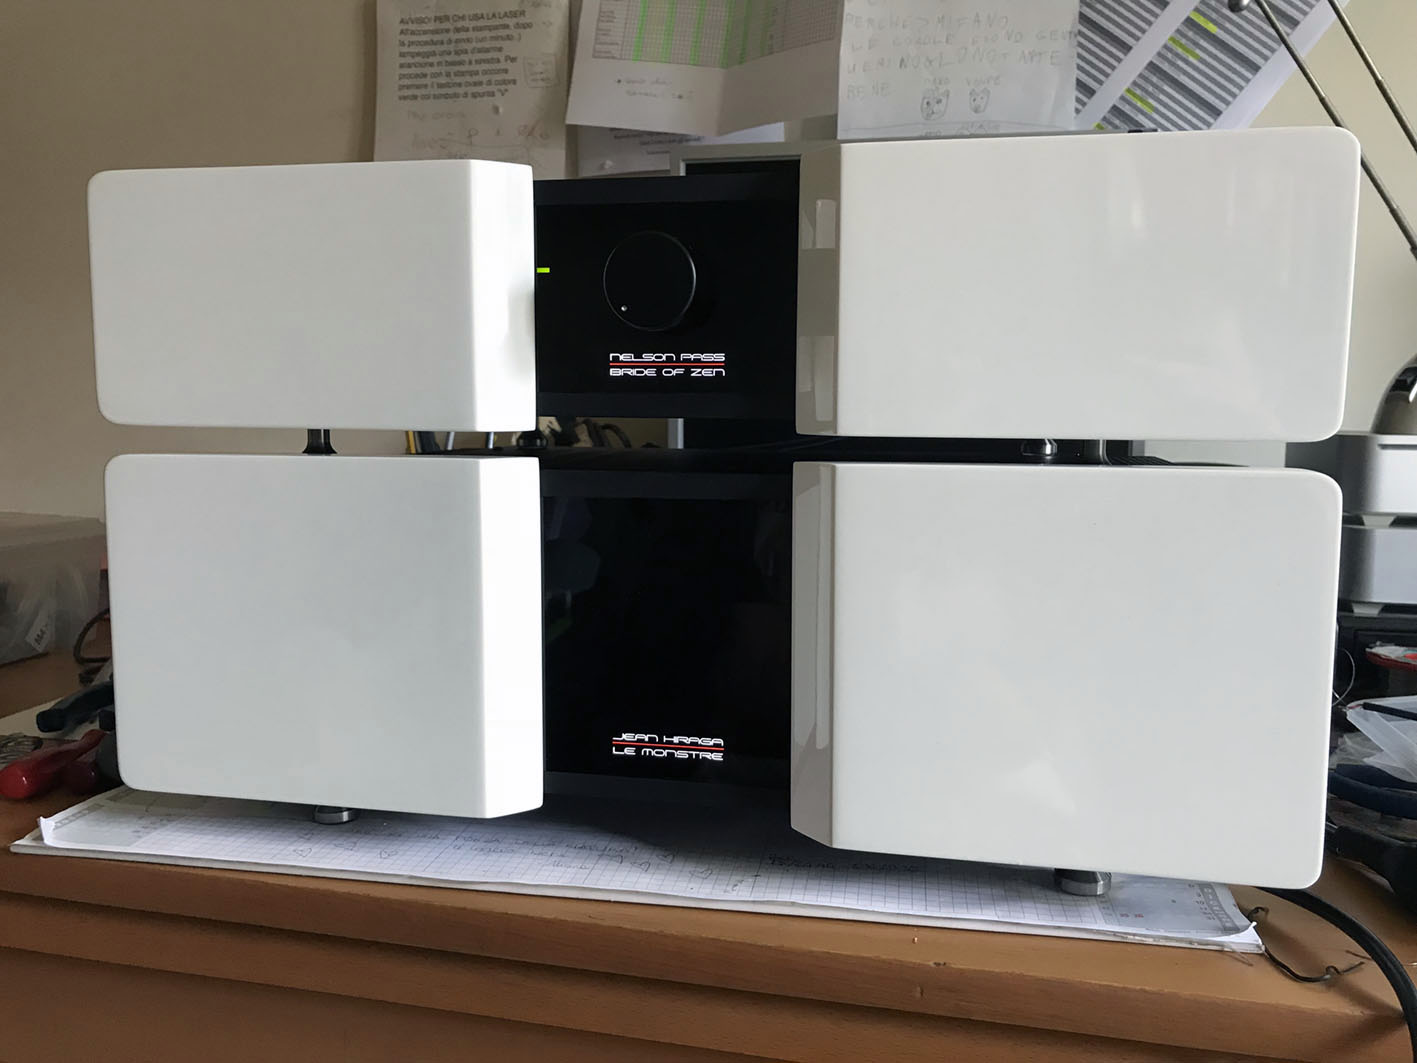
Hello, here picture of my new DIY AMP for VOLUMIO streamer. Preamp: Bride of Zen by Nelson Pass (8 input with IR sensitive zone for change Input selection). My hand-made touch screen !!! Green Led bar show you which of the eight input is active… Cheap and glamour.
Amp: Hiraga Le Monstre (8w Class A).
Sound is great…
Hi Jago, very interesting. Can you share the electrical diagram of the touch screen selector?
regards
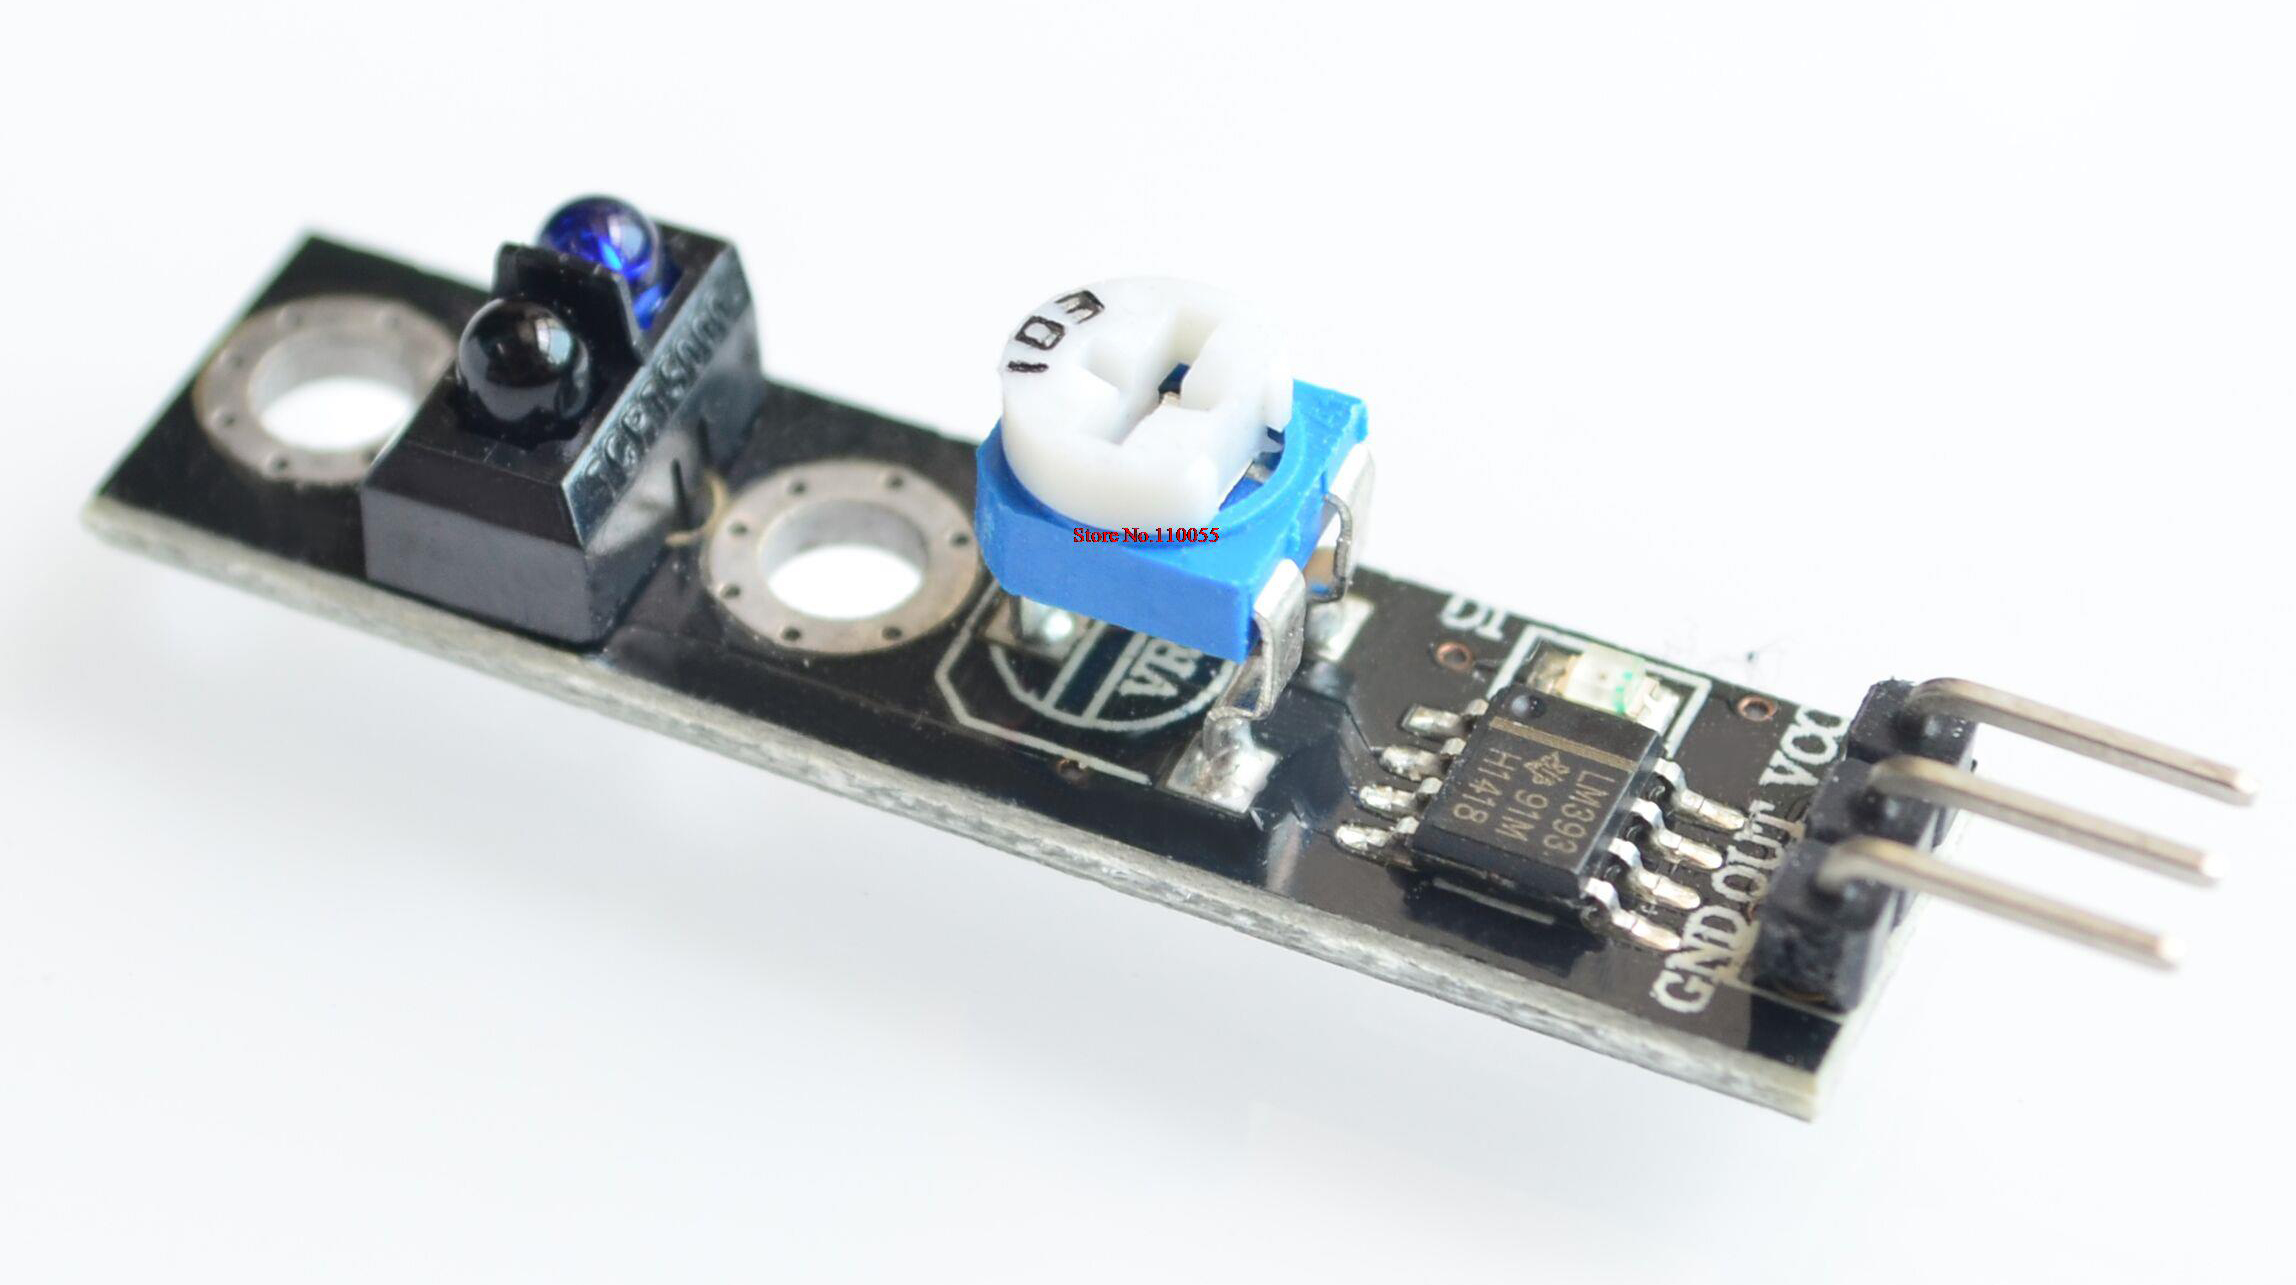
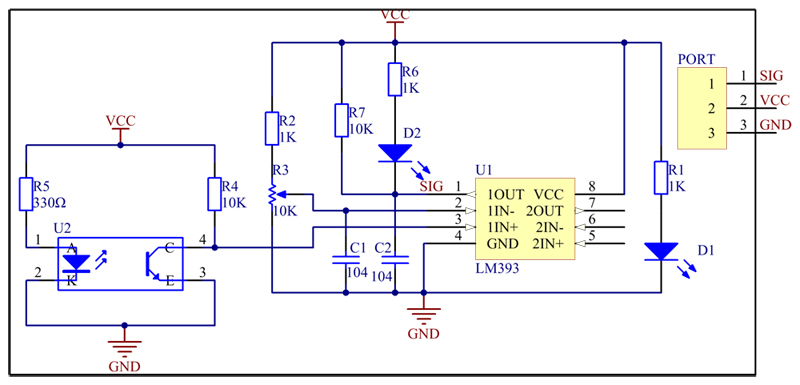
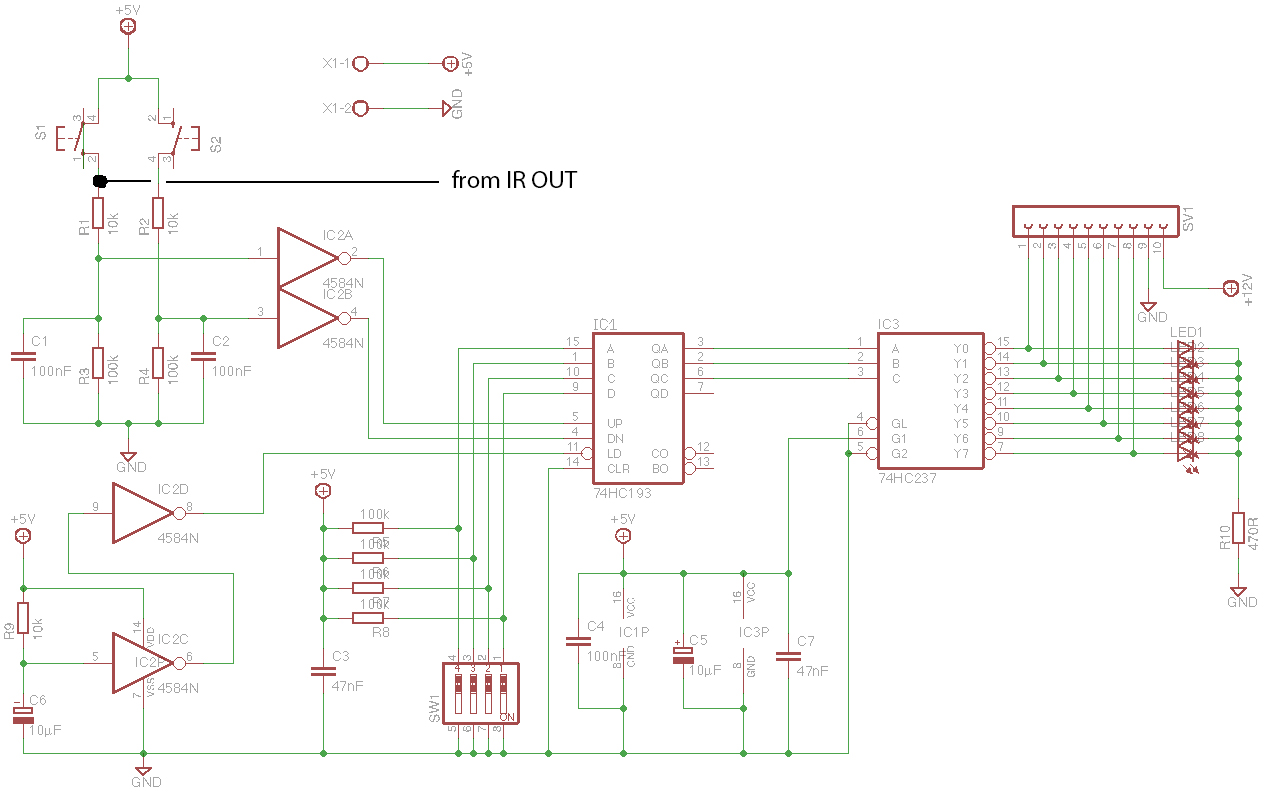
For the IR input selector, I bought (for a one euro) a LINE TRACKING SENSOR FOR ARDUINO board and connected it to a circuit that works with traditional switches. I’ve shifted the trimmer position in the oder side of PCB (desolder and solder). So, the IR module plastic package is free to get stuck in a small hole on MDF front panel (rear the grey Plexiglass). You need a quick sensitive adjust and “voilà”. When the finger touches the surface, the sensor changes state. These are the circuits I used…
I hope I have been helpful …
Bye
Fantastic work! Have you ever thought about taking on work for others making bespoke enclosures and setups etc?
Thanks, but I never thought about entering the business. l hardly know where to begin … it’s just a passion. 
Hello
Wow very nice project. Congratulation.
Do you take a special plexiglas or what exactly is that. Normal black/grey Plexiglas with certain translucency?
I want to build something similar with an oled display and a cnc milled housing made of aluminum.
I hope the google translator is correct 
best regards from Austria.
OE5AMP
Jago i suppose you are italian. Is possible see your job? I live near milan and bs.
Hi, OE5AMP, I use this Plexiglass:
Trasparent Smoke Gray 923 / 3 mm
I buy it on Line…
Bye bye, Jago

ciao!
Che dire? I tuoi progetti sono sempre più stupefacenti!
Complimenti!
Andrea
P.S. Lo streamer suona ormai da quasi un paio di mesi… magnificamente!
Dear Jago
First of all: What a beautifull system you’ve made! great detail en awesome colorscheme.
I am planning on building my own volumio/dac player and most of the things i’m pretty sure how i want this and how to make this. But i am still in doubt about a power on/off button. The player is raspberry pi based so it isn’t about power consumption but it’s more a question of use. I simply want to push a button to power down the volumio/dac player. How did you made this? and does this solution really powers down your system or does it go into a sleep state? btw, i am referring to the Volumio + Rasp 3 + Audiophonics Sabre V3 + OLED + Apple 1156 remote
MDF wood and dark gray plexiglass.
Kind regards,
Ewoud
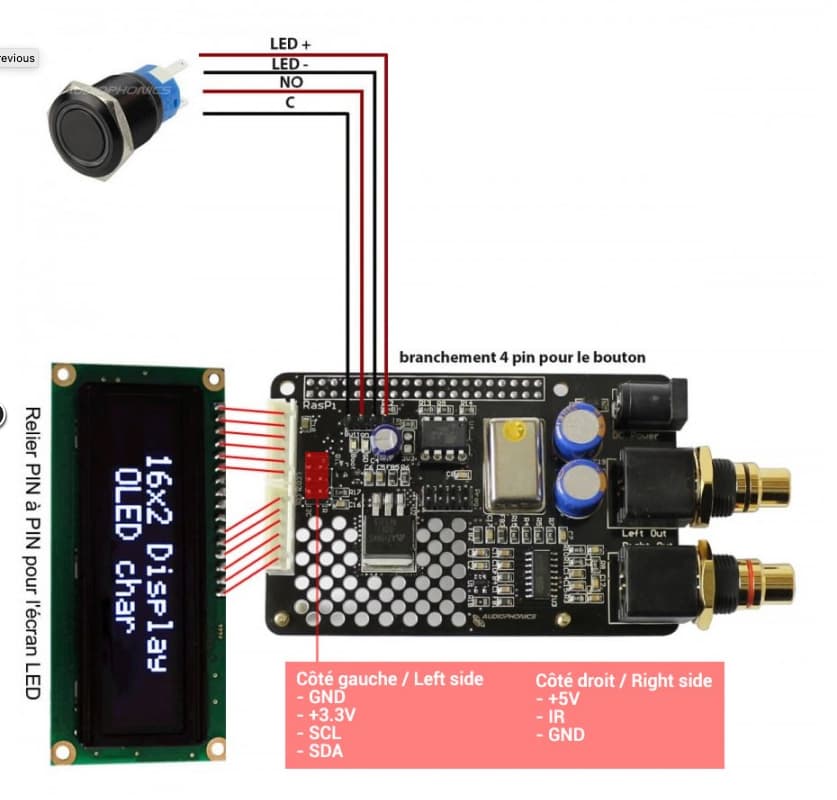
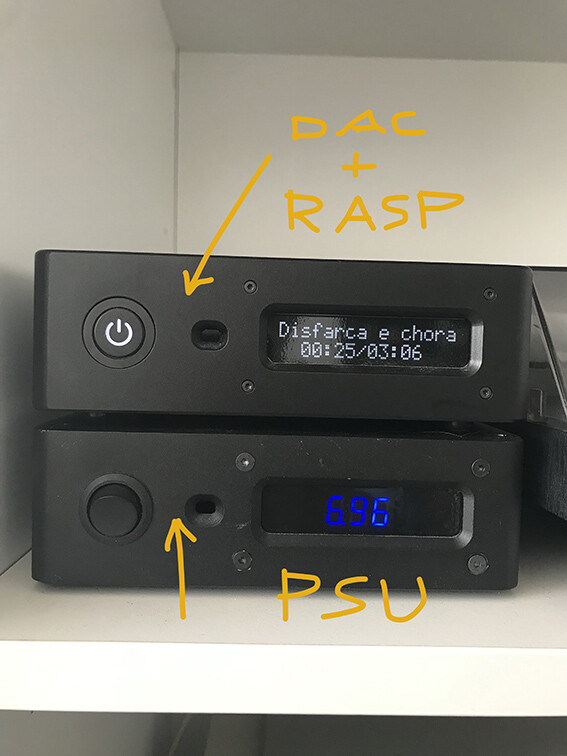
Hi Ewoud thanks for the appreciation. During shutdown, the button flashes and closes VOLUMIO. (922.59 MB file on MEGA)
On the Oled display, “Goodbye!”“ warns of the shutdown. It’s not a standby. The entire apparatus is turned off. If the button is pressed for several seconds, the output is forced and it switches off abruptly. For the circuit, it depends which DAC you have. Since I have two, I have tried both solutions. They work very well. Hello, Jago
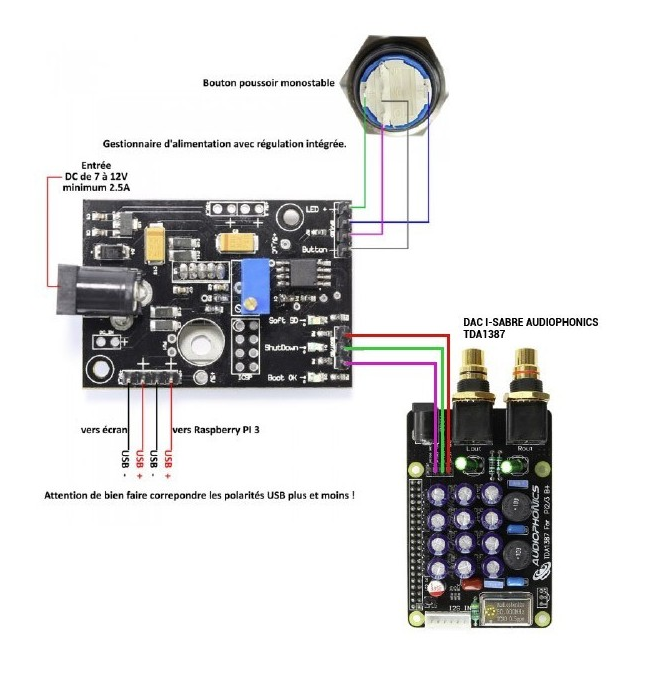
Thank you for the reply. It’s beginning to make some sense to me. But as alway’s one question raises another. what kind of power supply did you use in your project? Because if i am not mistaking the solution with the AUDIOPHONICS PI-SPC REG Power Management requiers an 7v to 9v power supply. That isn’t even the biggest problem but to find a low noise power supply which has a output 7v to 9v isn’t that easy. Are you by any change using a power supply from thel audio?
kind regards,
Ewoud
Hi, for my 2nd project, I built this power supply. It powers the SABRE DAC directly over the Raspberry. The Raspberry board is powered by the DAC board.
I plugged it into this box and adjusted the output to 7V. The quality is good!!!
1 Like
where did you get the board?
