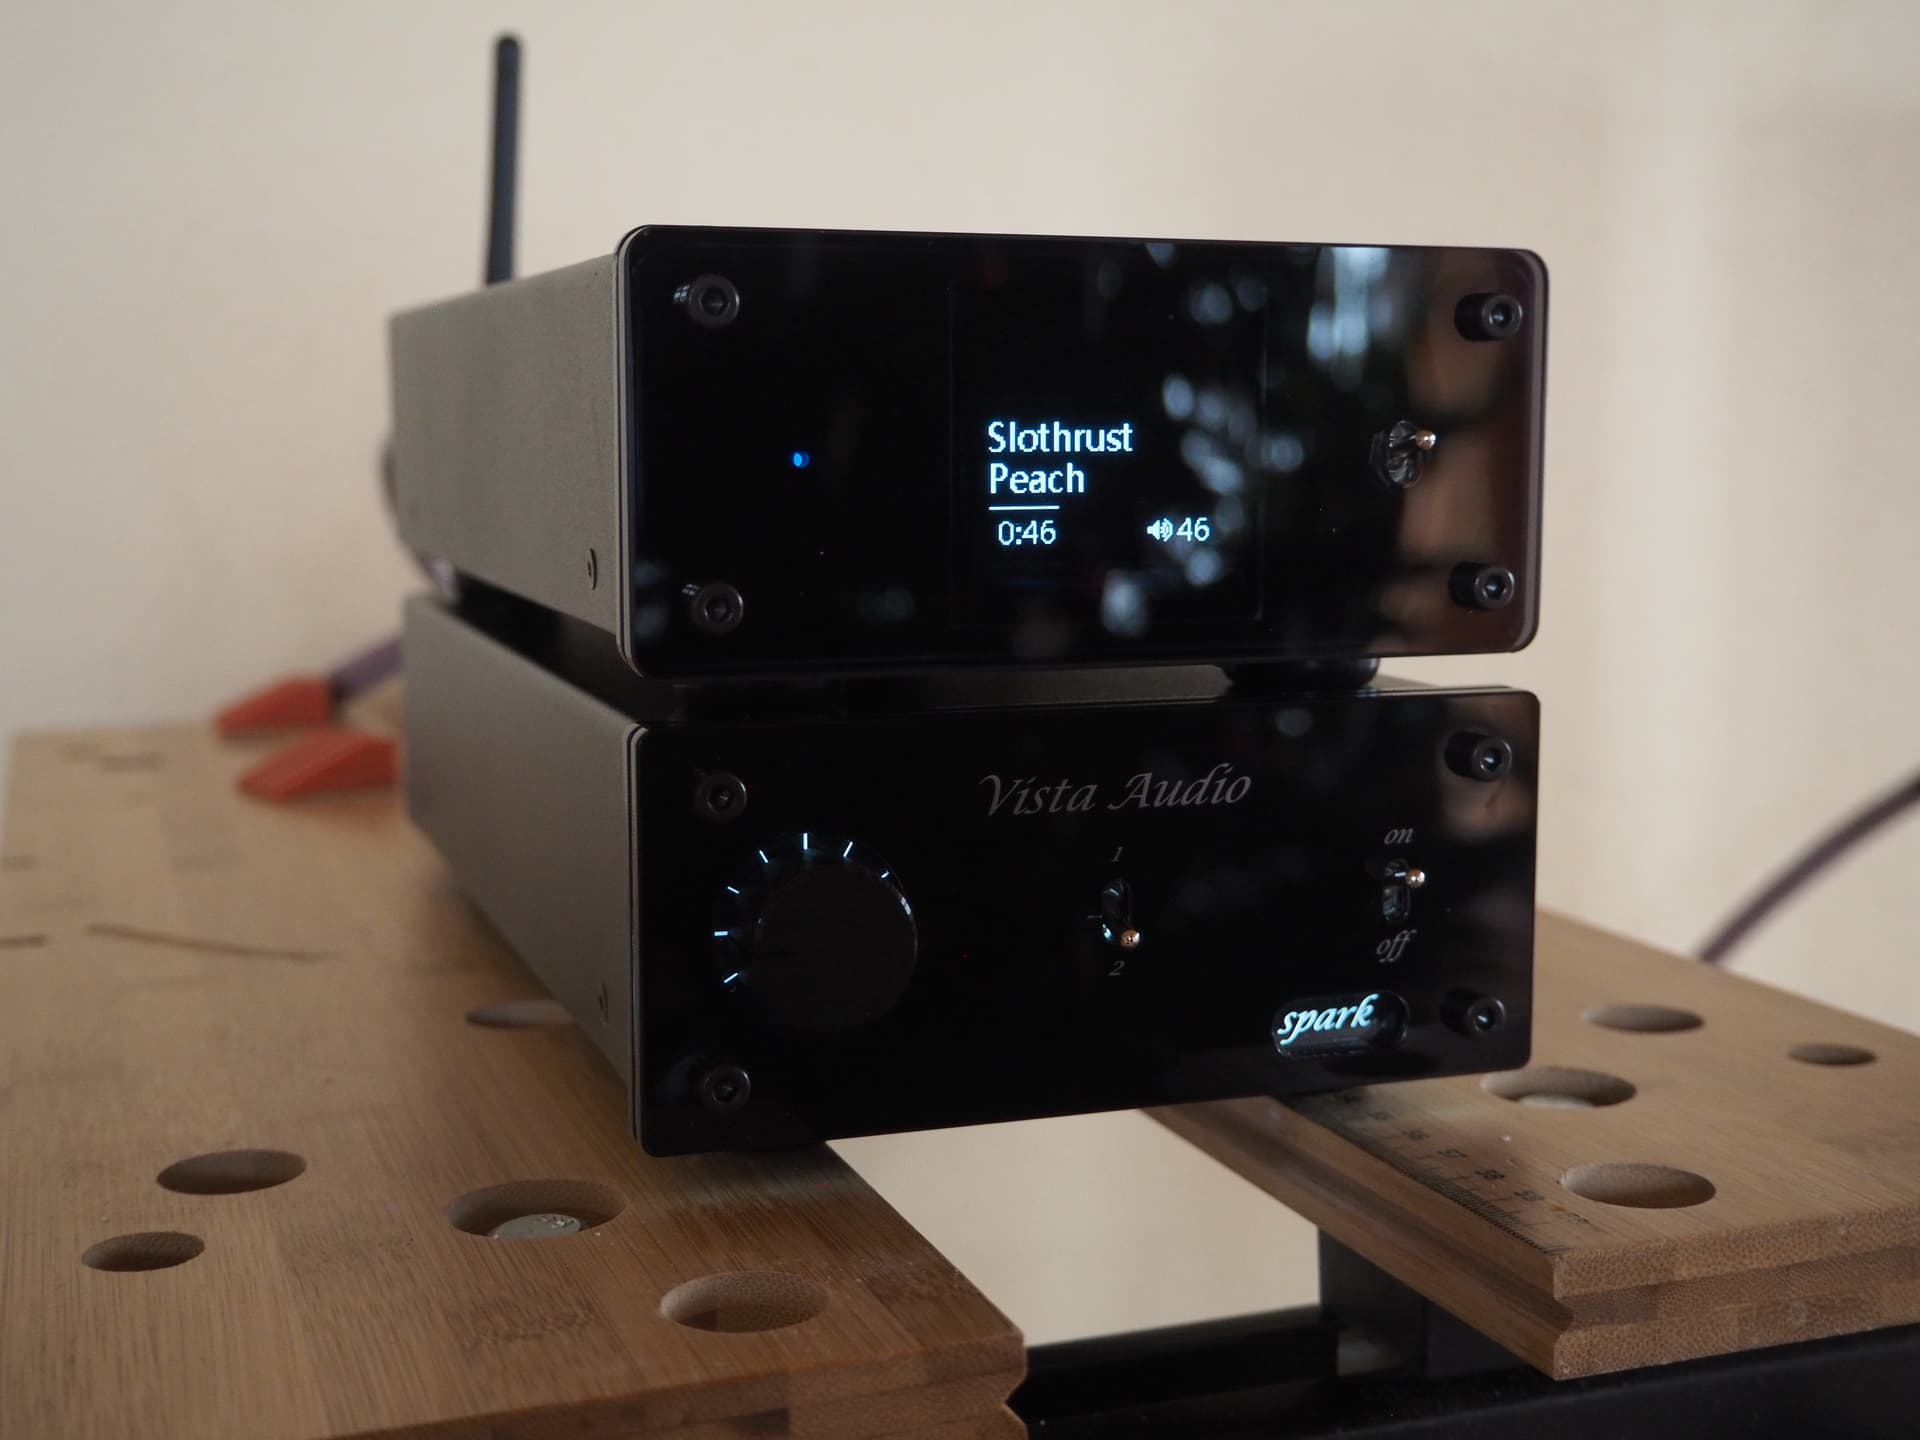
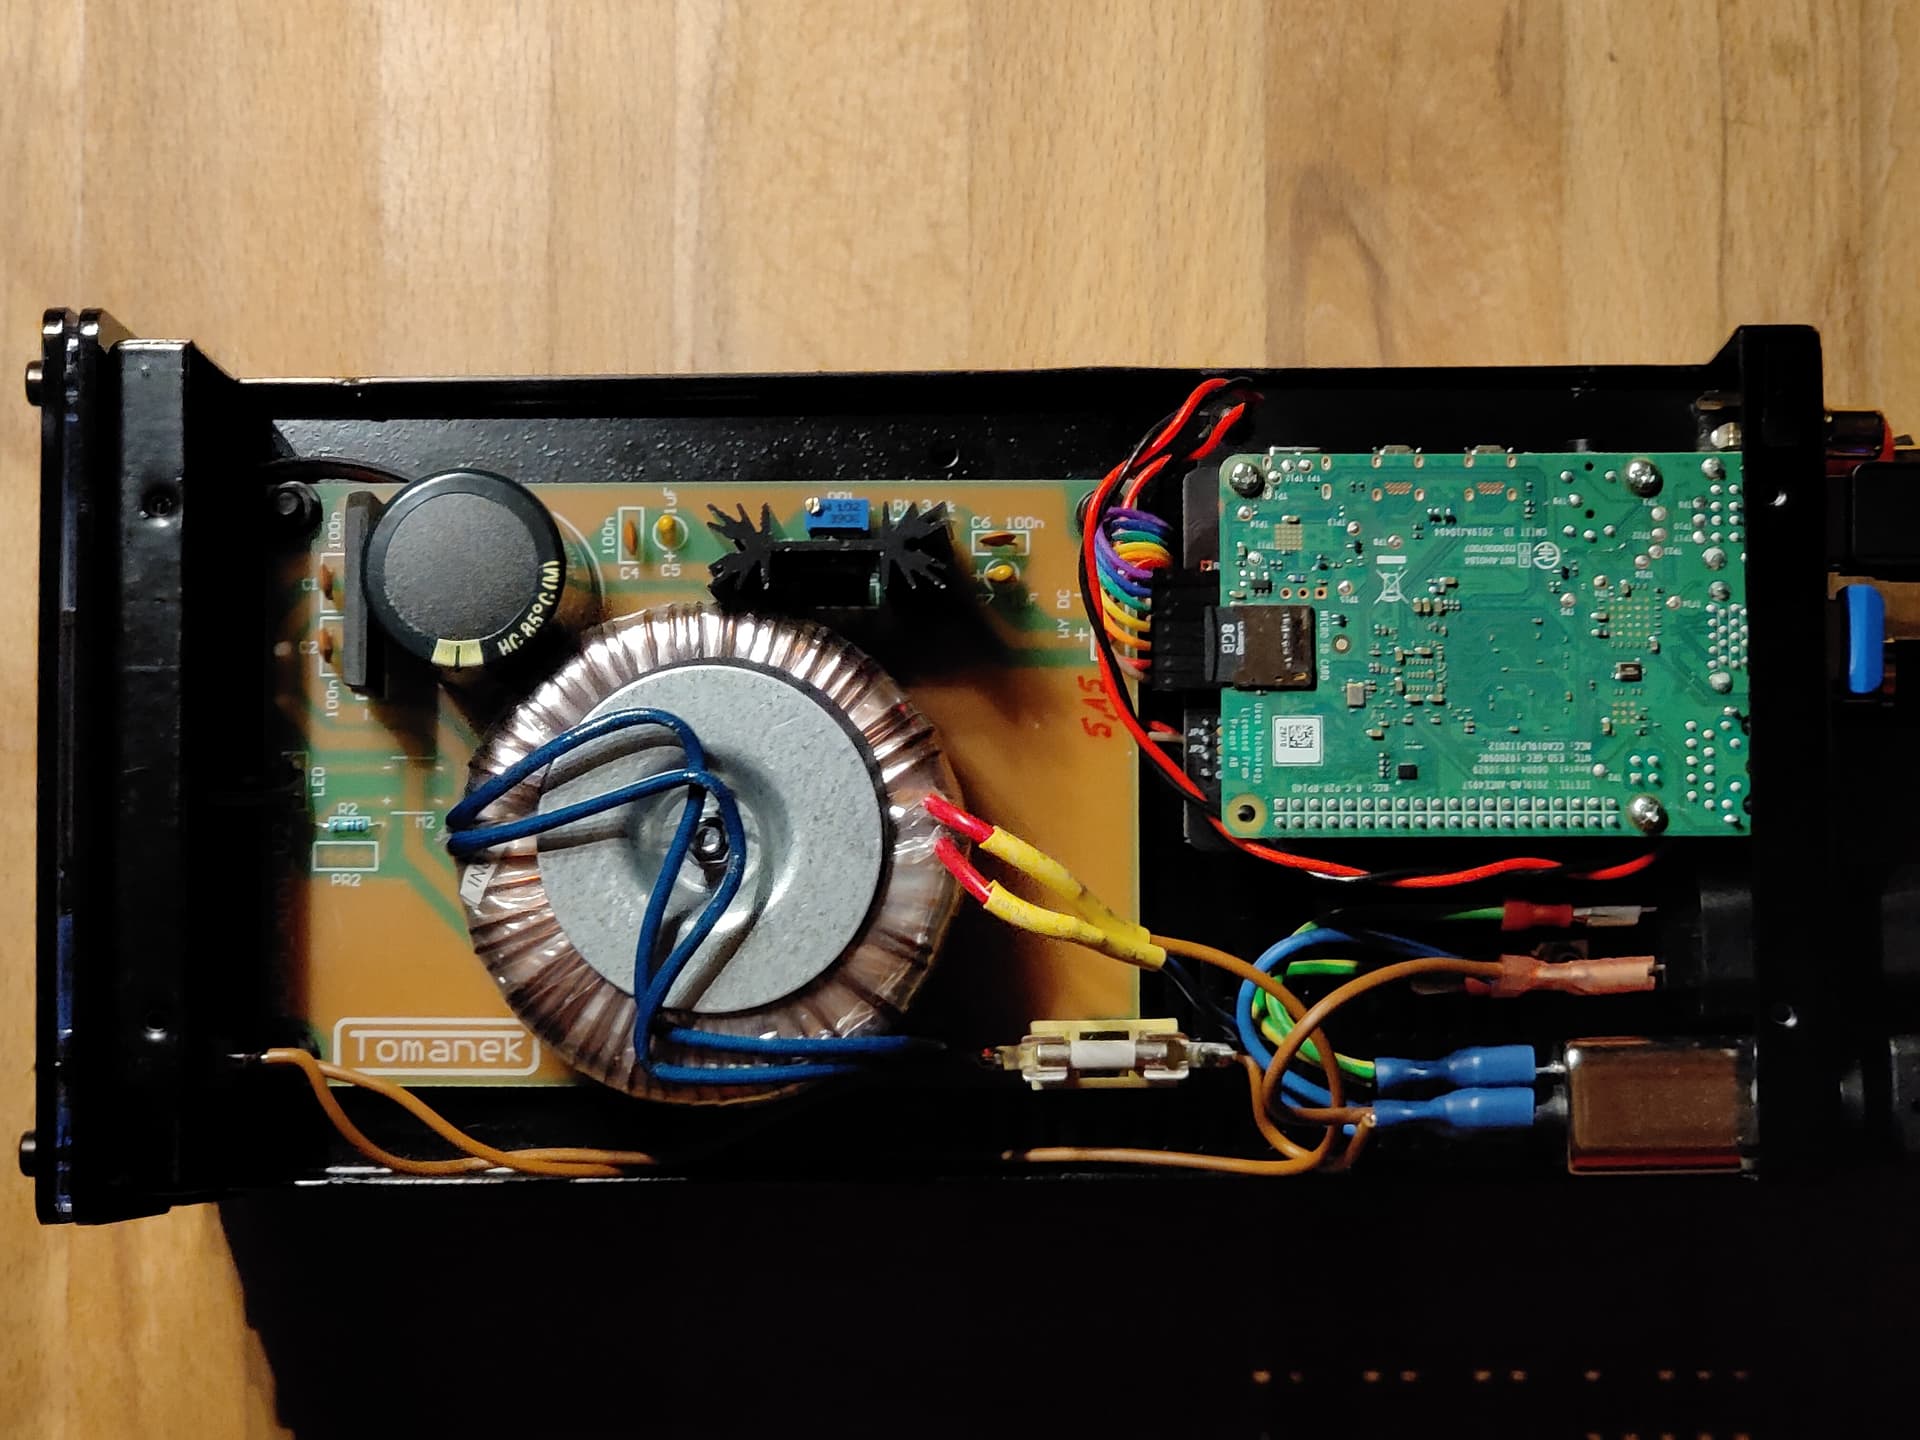
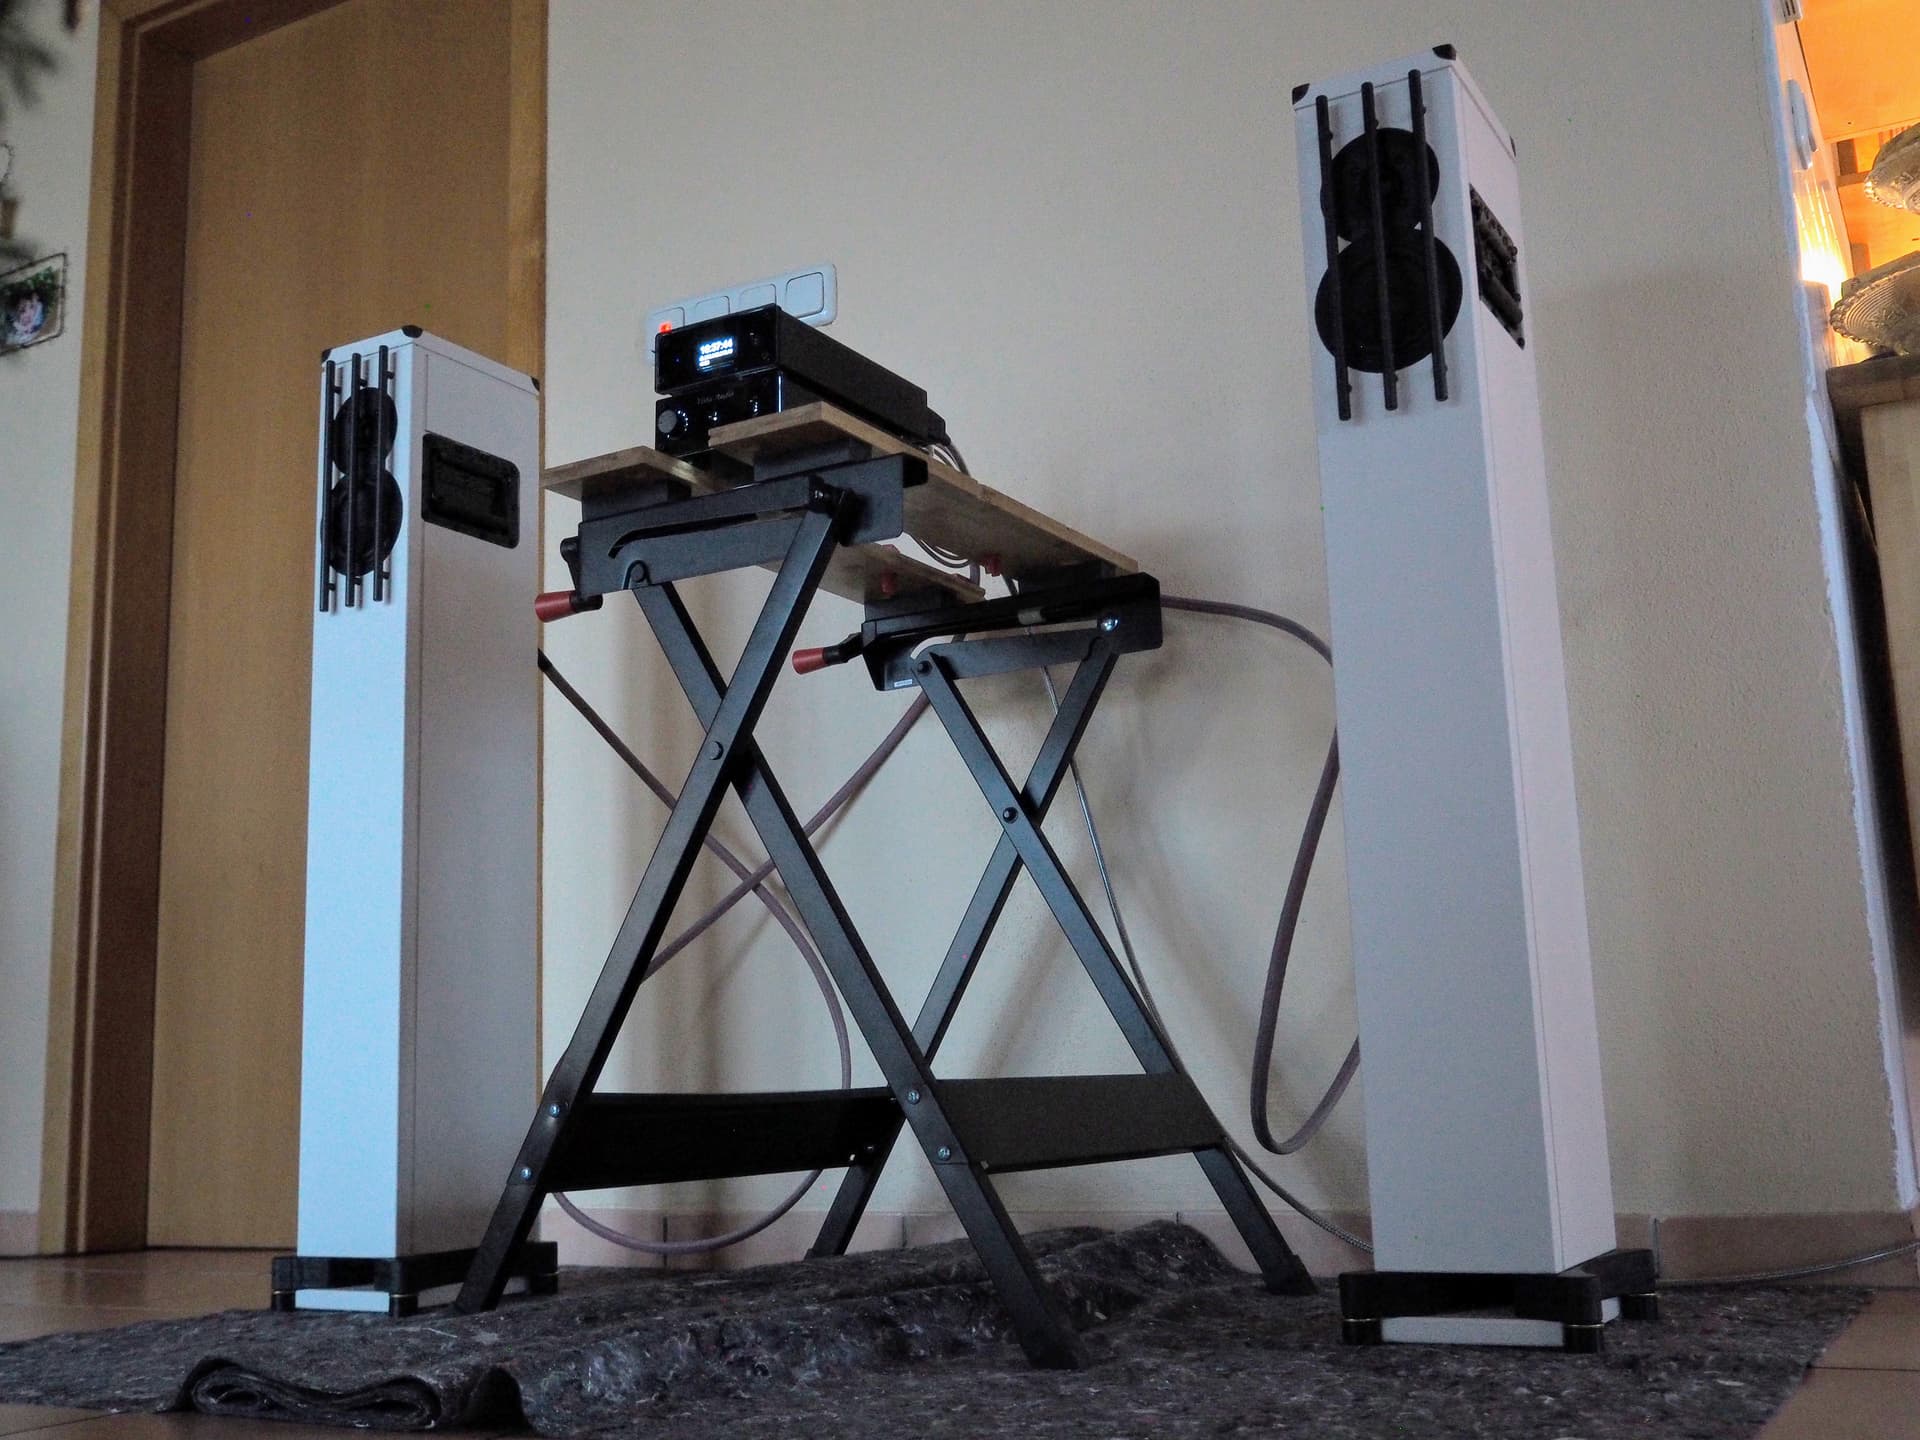
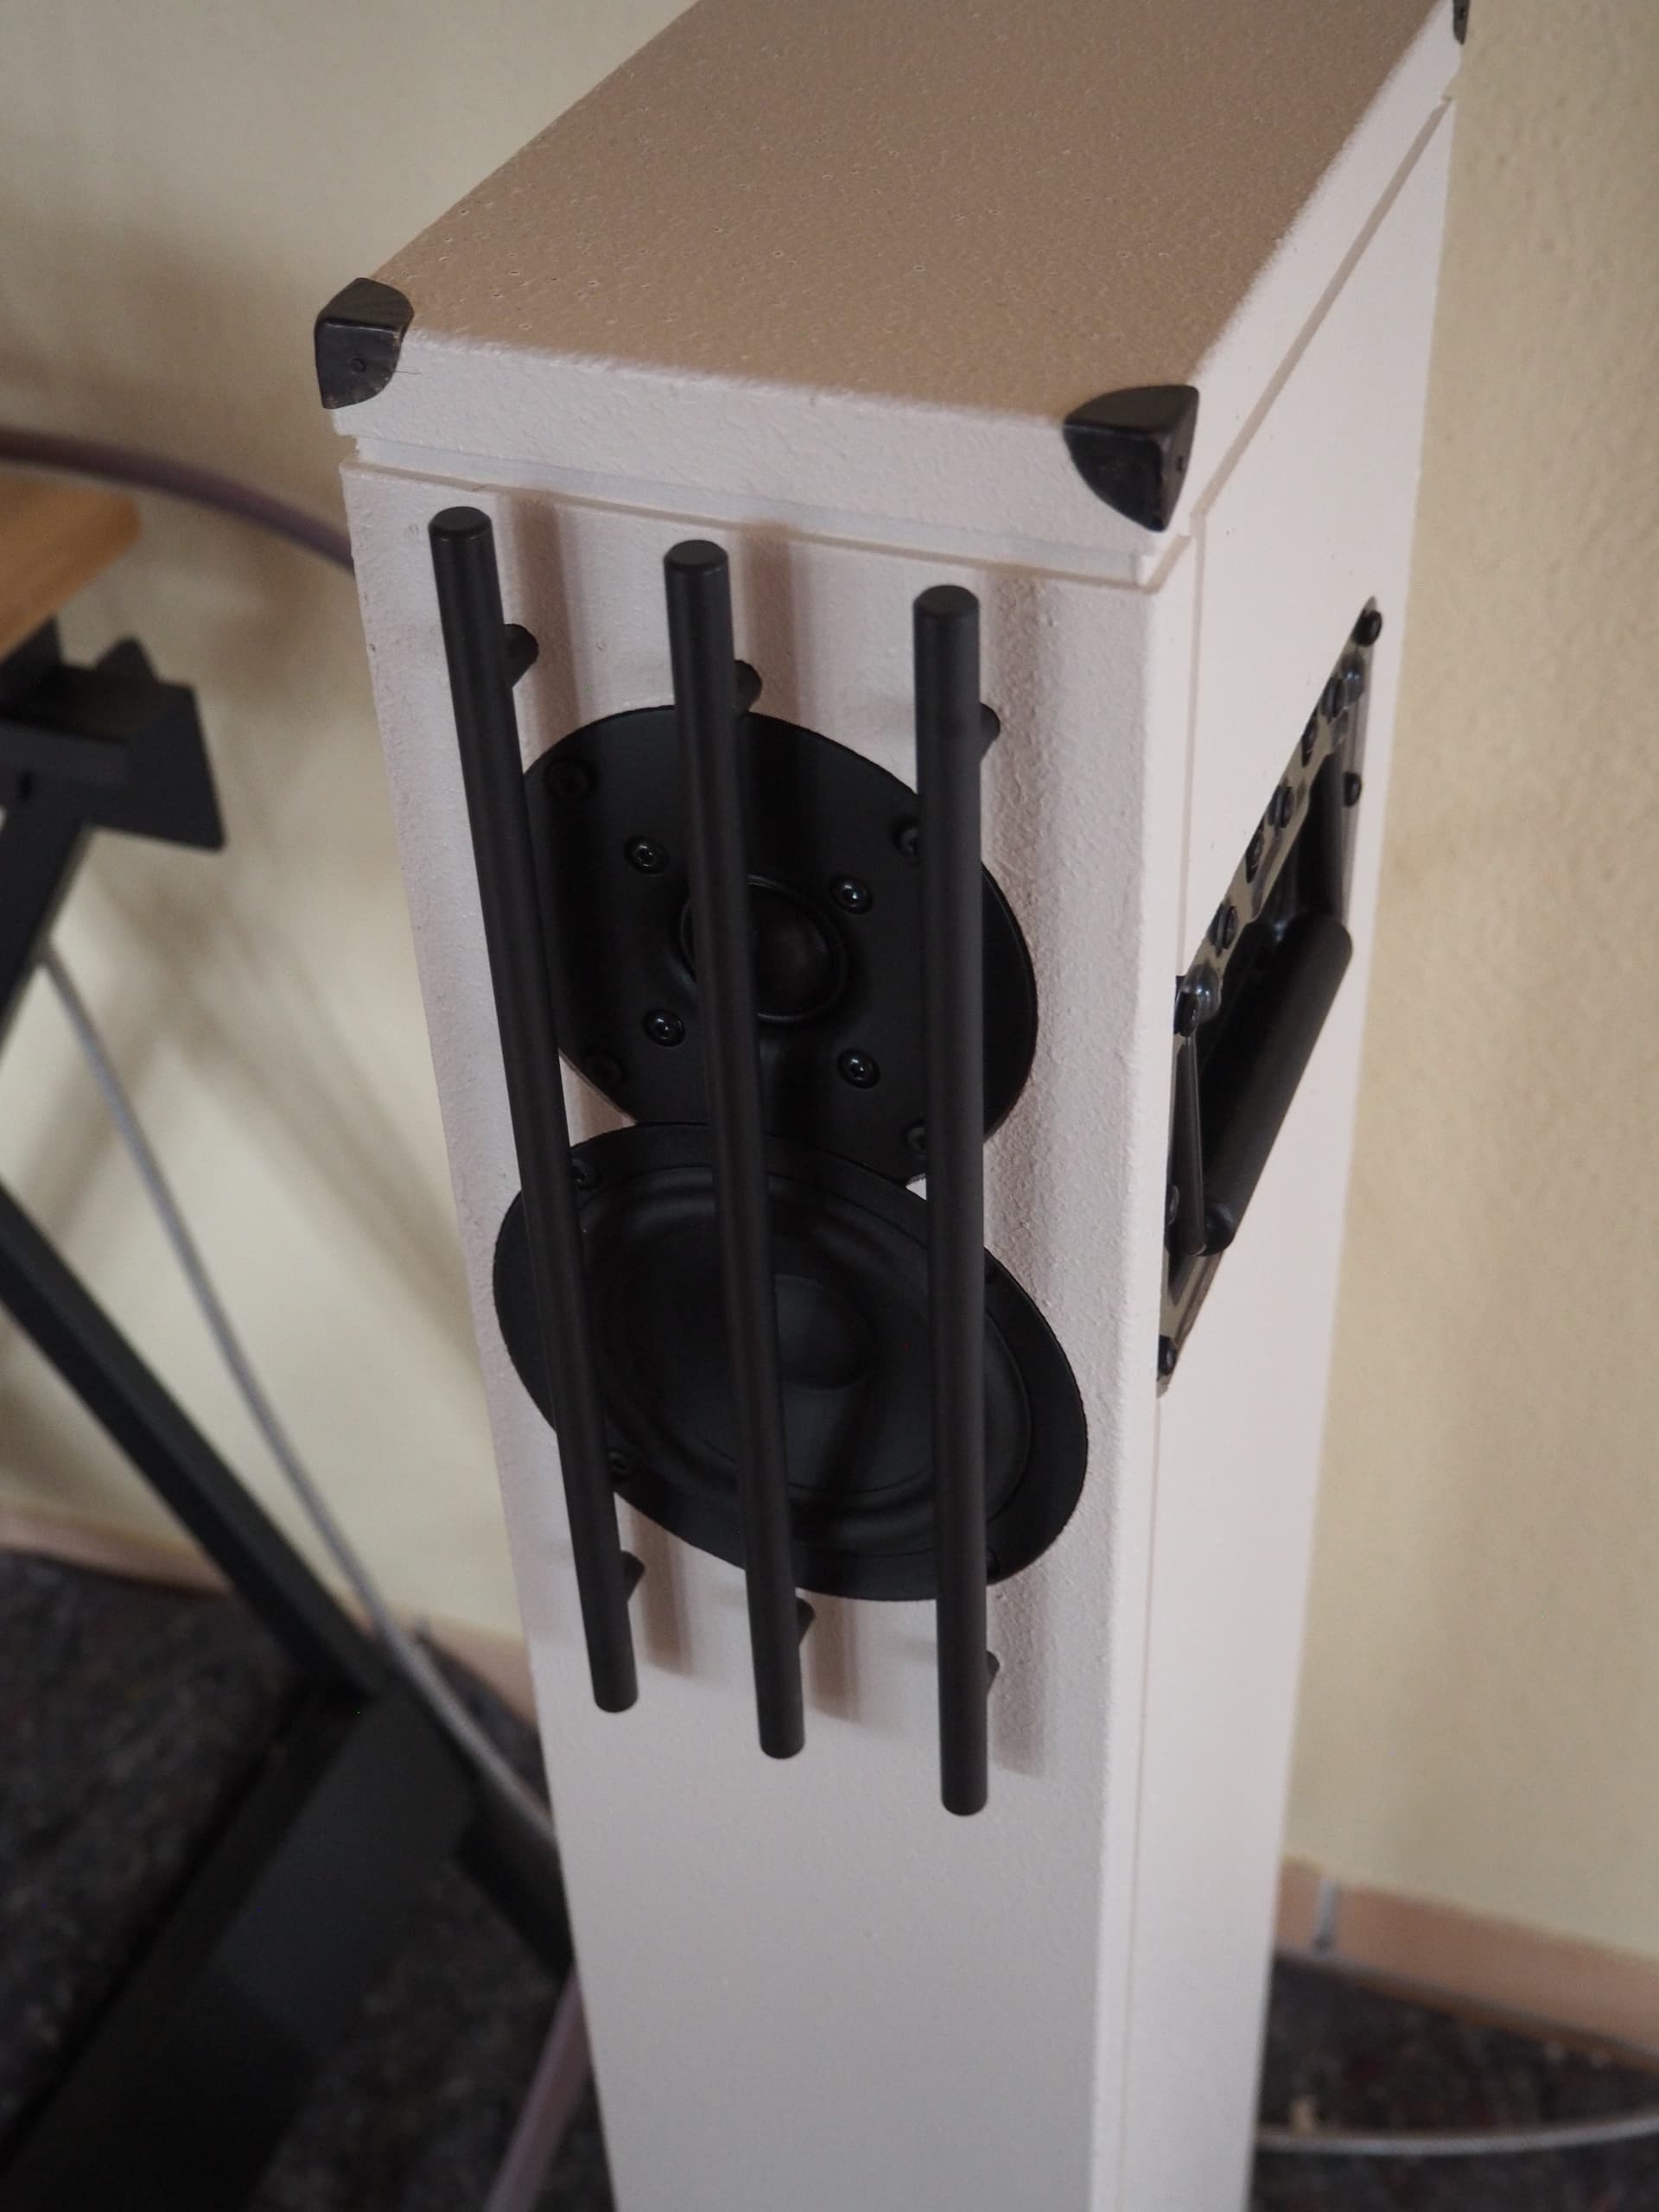
Just found these amazing projects. Thought to share mine. Basicly a RaspDAC Mini (Audiophonics) Build into a second casing I got from the manufacturer of the Amp (Vista Audio Spark). Together with a linear PSU from Tomanek. IEC Inlet filter with filtered 230V output to the Amp. Garnished with some DIY Speakers. Lockdown project during the winter holidays 2020/21.
Very nice project and your wiring is great. Unfortunatelly my similar lockdown project is not as neat. In fact i’m too ashamed to post pictures of the inside of my project.
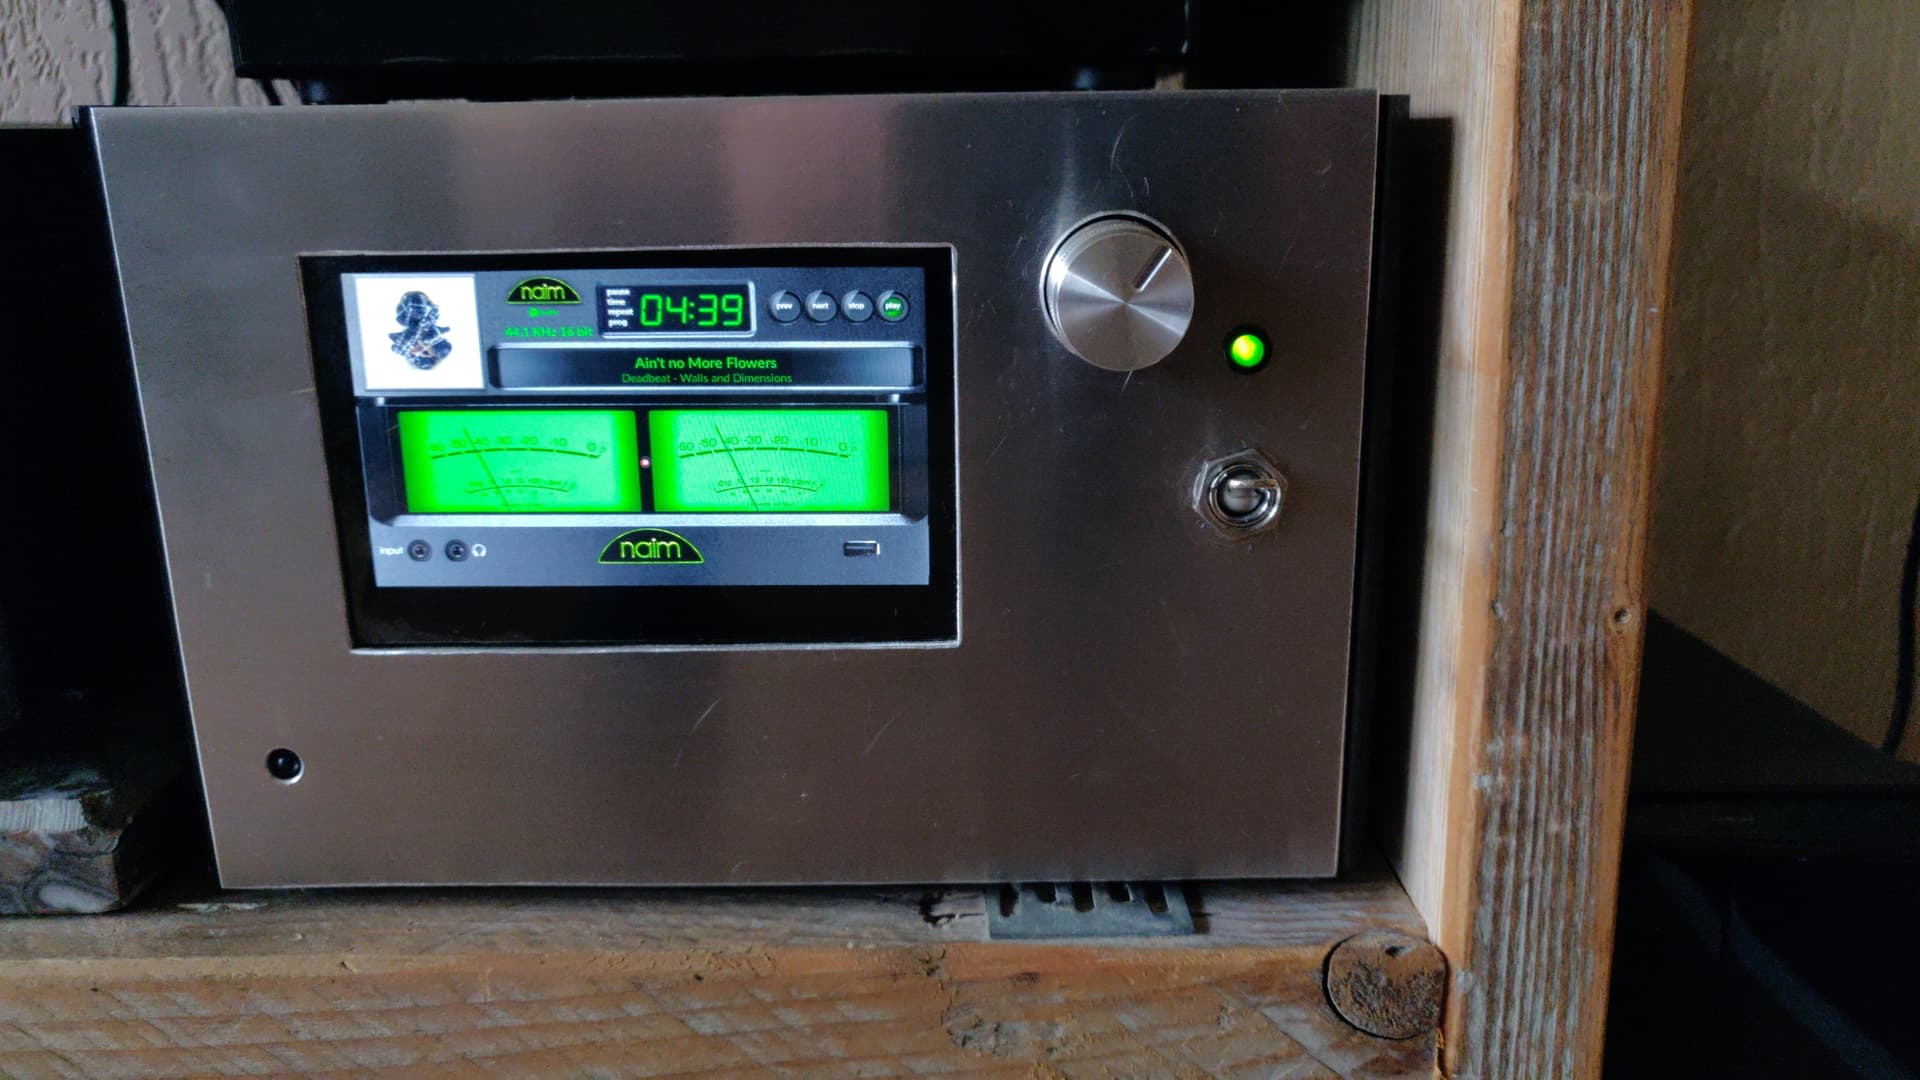
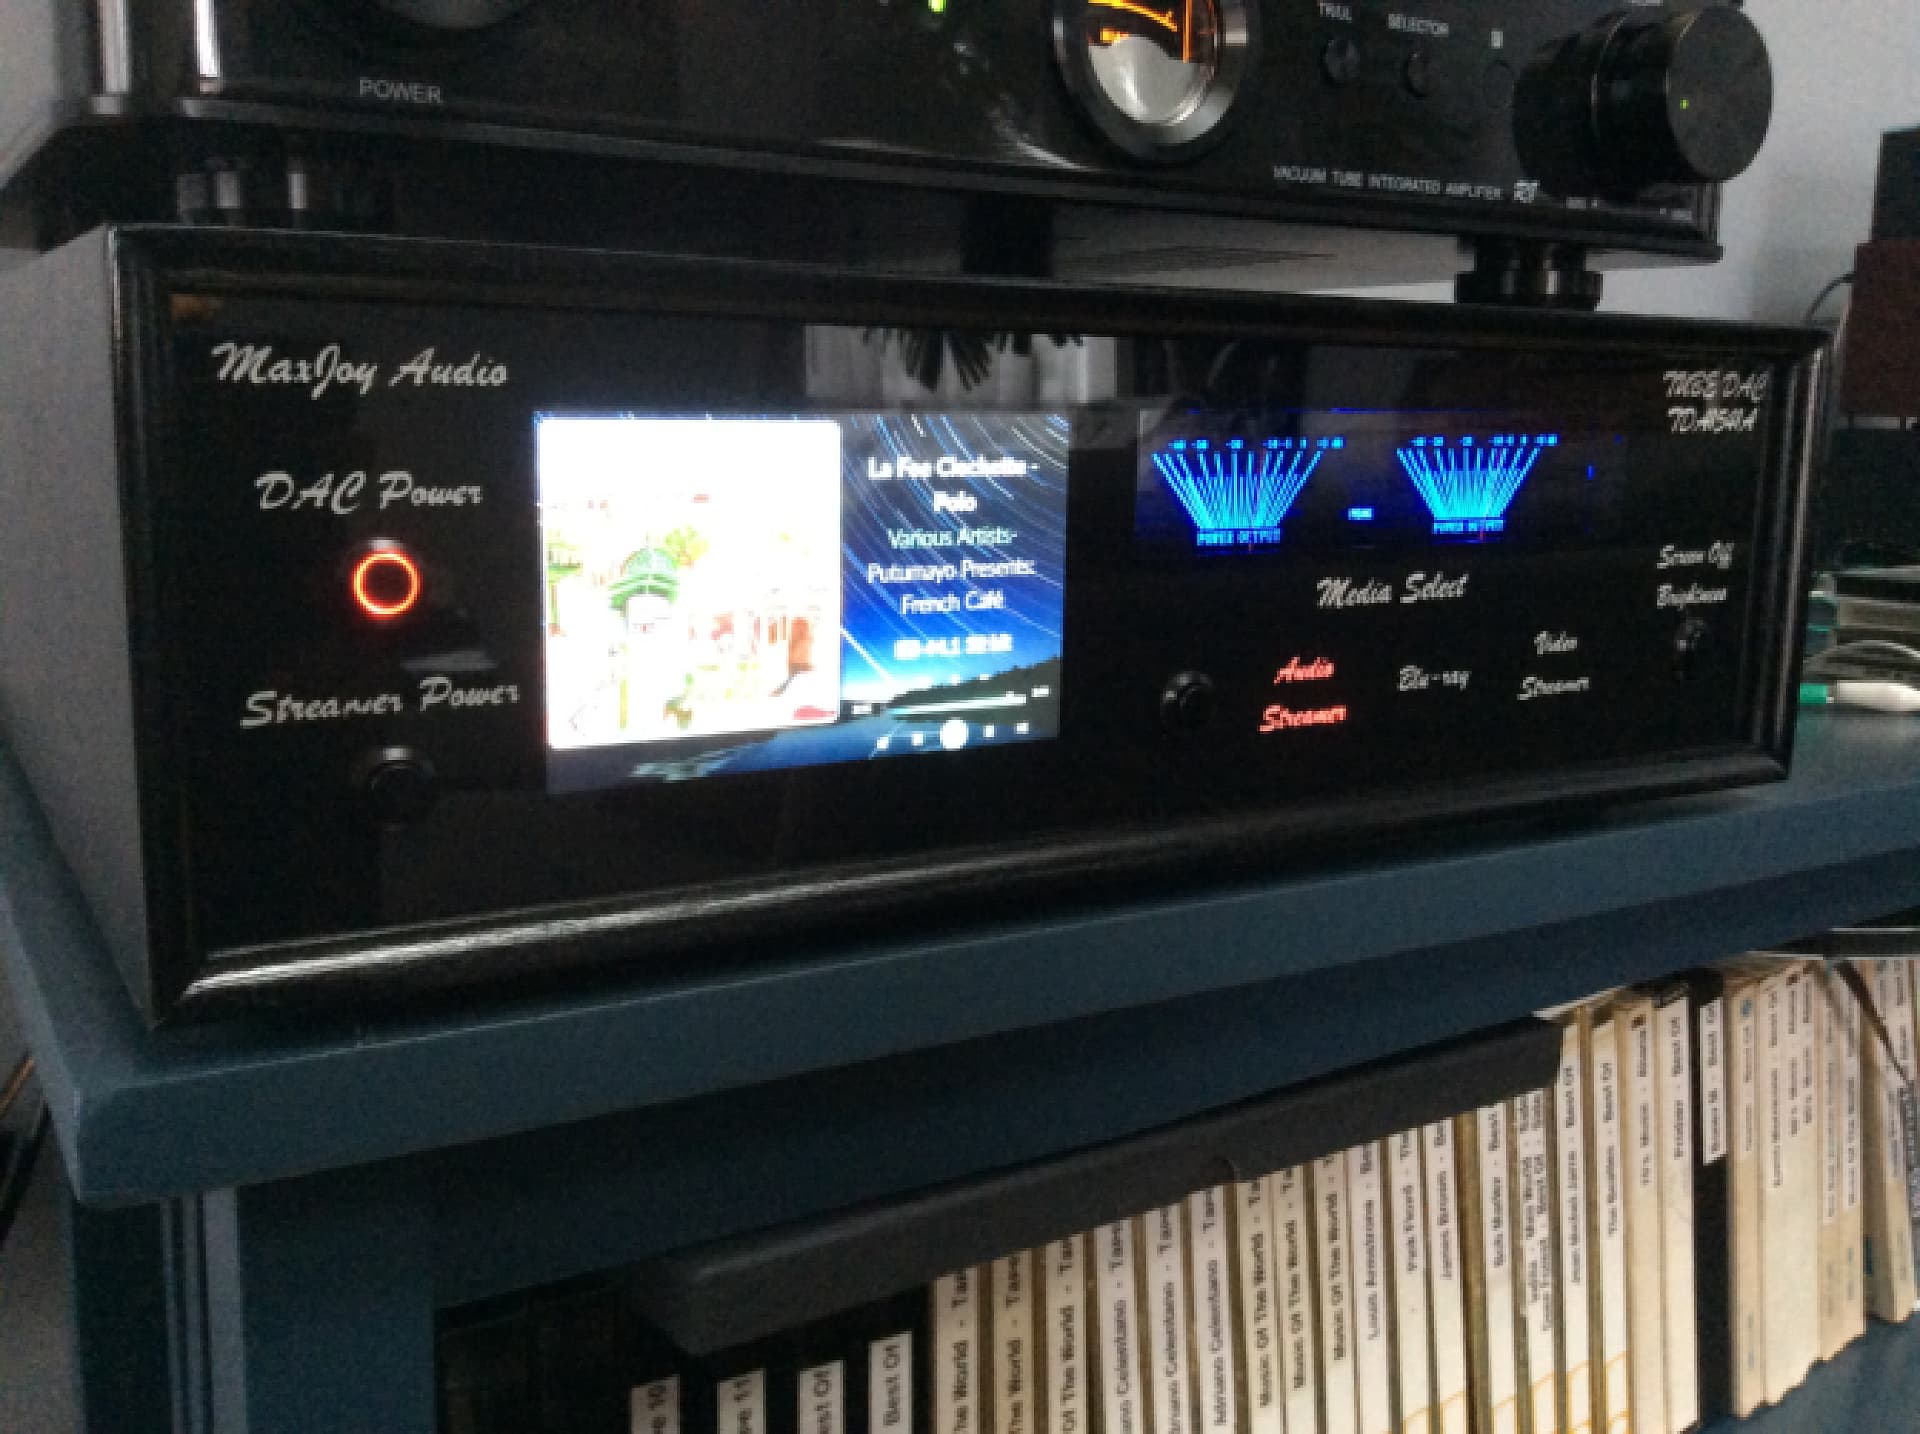
For my box, I’ve used a Dell 3040 thin client thanks to another poster. Volumio outputs to a tube DAC based on the Philips chip TDA1541A and lampizator’s schematic using russian tubes 6N2P. I pretend to be a tube guy but in reality I just do it for fun. Optionaly, volumio can output to a usb hidiz 9s DAC.
Besides Volumio, it also has another spdif input for cd and another for a chromecast in case you want to stream vidoes on that tiny screen. All inputs go through the tubes.
The vu meter is for looks mostly and it turns on when a signal is detected anywhere in my system regardless if volunio is on or off.
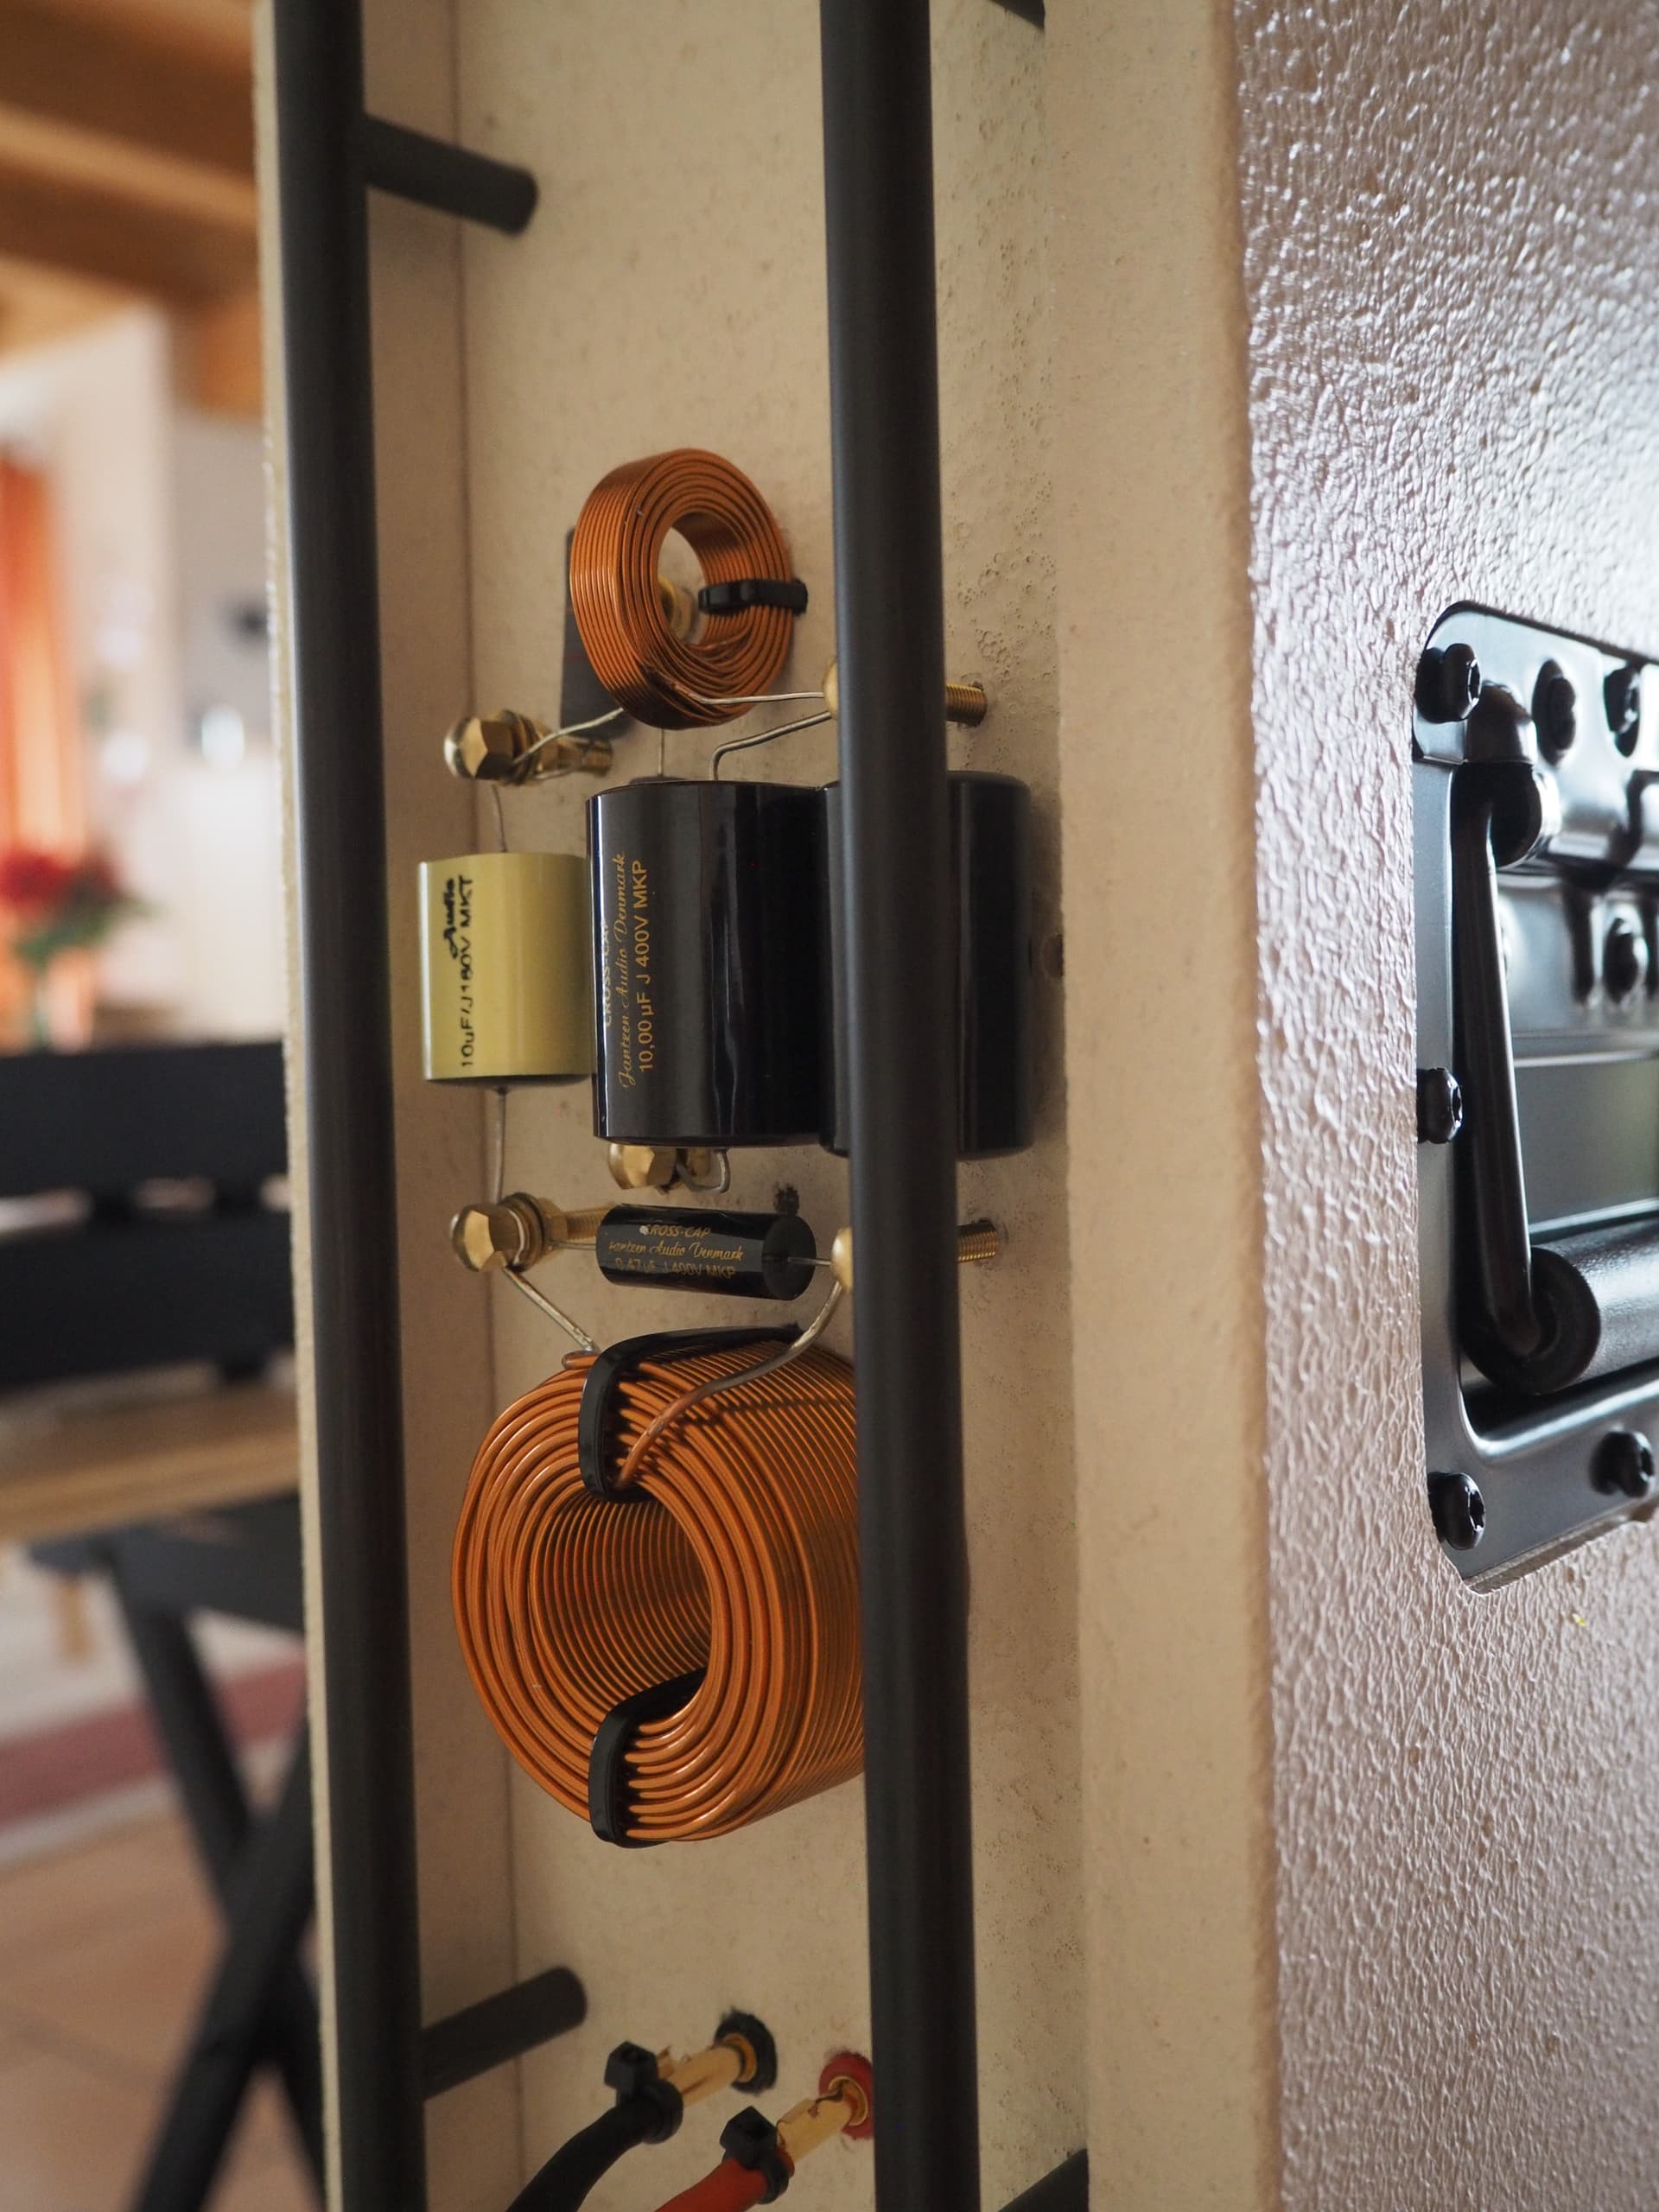
Also very nice . I wanted to keep things simple because my goal was to spend not more than 1k€. But that was already done purchasing RaspDAC, The Pi, PSU, Amp, Transducers & Crossover Parts. So finally It was 500€ additional for “optics & other odds and ends”.
The wiring couldn’t be simpler: Just L & N (L via fuse & switch) from IEC inlet filter to transformer. GND to chassis. Another set of these 3 to 230V output socket. 5V from Tomanek board to dedicated solder points on the DAC HAT.
There are GPIO pins on the DAC HAT for the Display which were extended simply by 7 GPIO jumper wires. Another three were soldered to the IR receiver. They go to GPIO pins on the ground board which I hat to cut 2cm off to make everything fit into the tiny space.
The ground board sports an ŔCA SPDIF input, too, which can be selected via remote.
the Display was included in the RaspDAC Mini LCD, which is unfortunately discontinued. But there is a successor with a bigger color display.
The front consists of 3 sheets of acrylic glass like the Amp. The first slightly opaque only with the holes for screws and switch, the second (clear) is a few milimeters smaller than the third (black) which have both additionally the cutouts for display an IR sensor and the blue LED.
Inspired by the great enclosures of other users I thought of my very own solution for the living room .
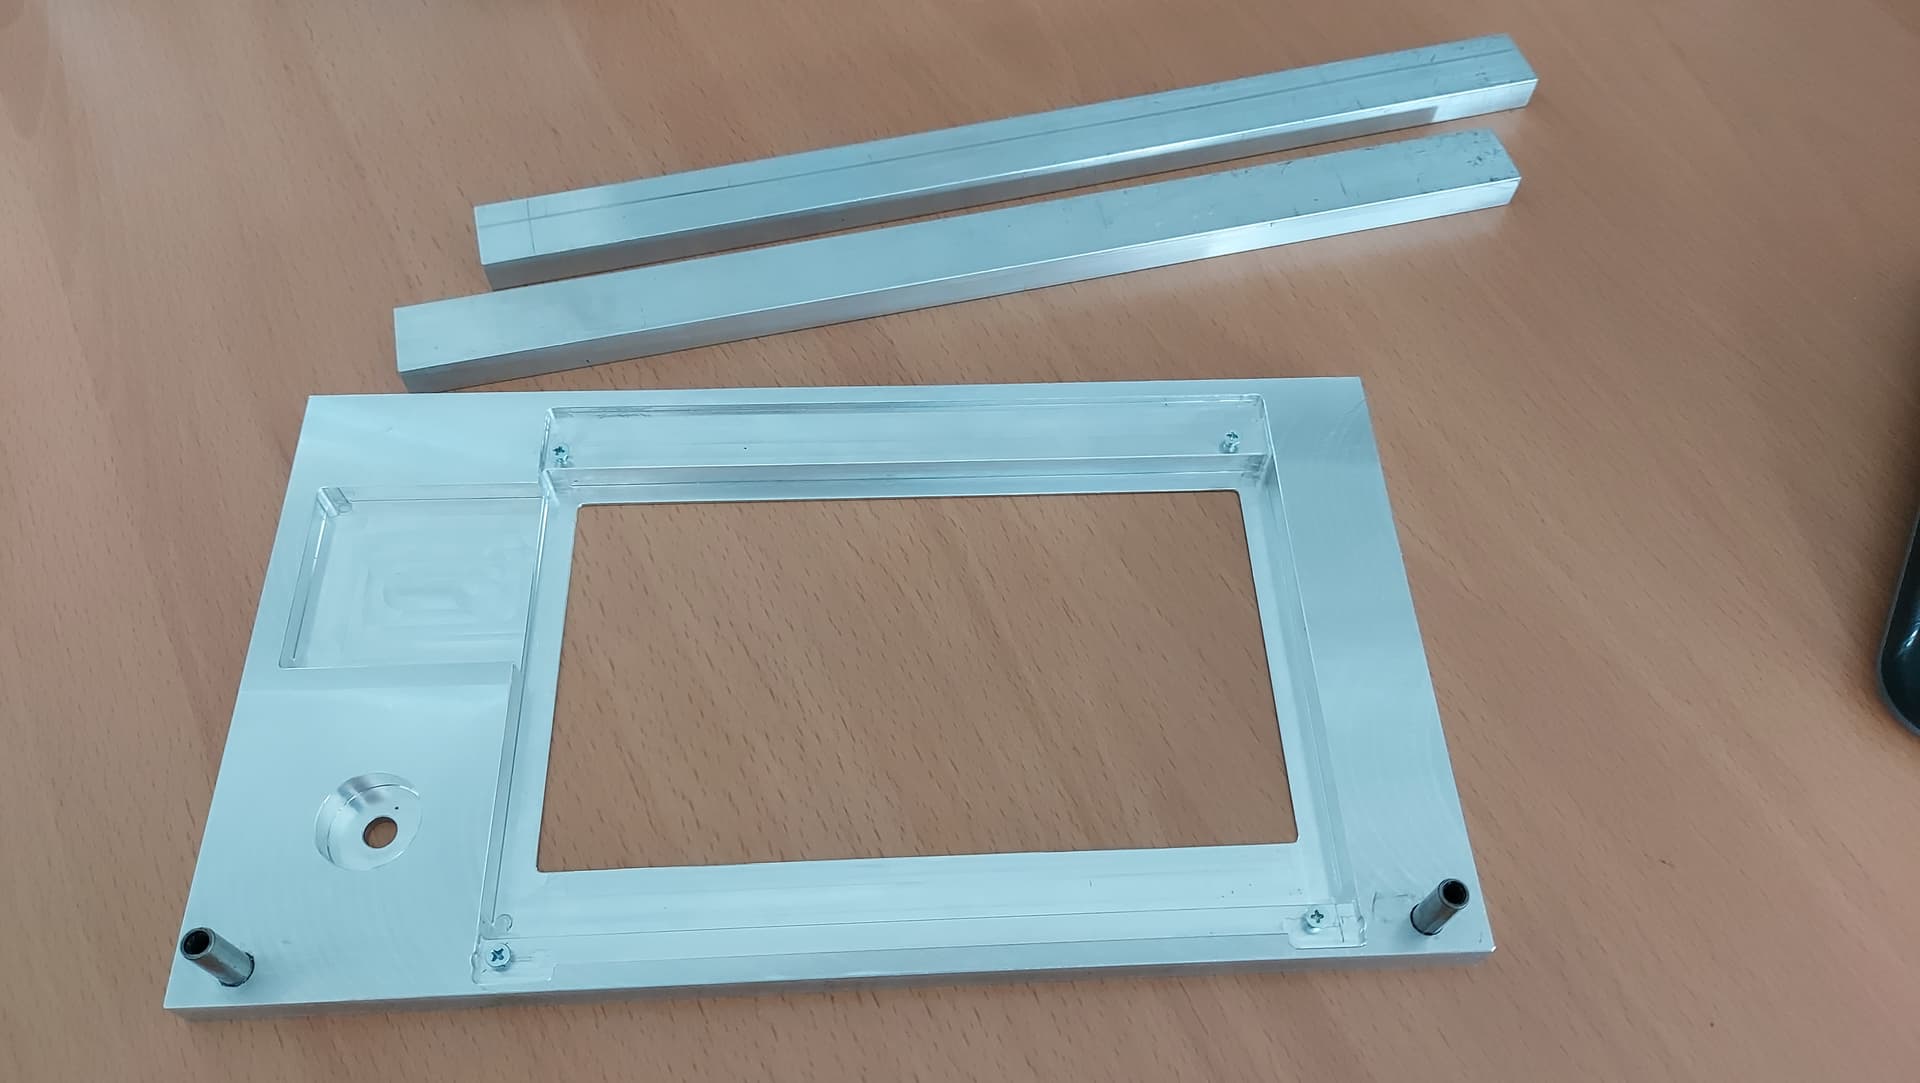
After the whole thing was precisely measured I sat down with my colleague Enrico and we created a simple but well thought-out solution
The basis is a mm thick aluminium plate, two pinned stabilising and stop profiles as well as a MOM-OFF-MOM button.
We drew the whole thing in CAD , programmed it and then milled it on a DMG. Only the threads on which the display is attached to its tabs were cut by hand 🫱🫲 afterwards.
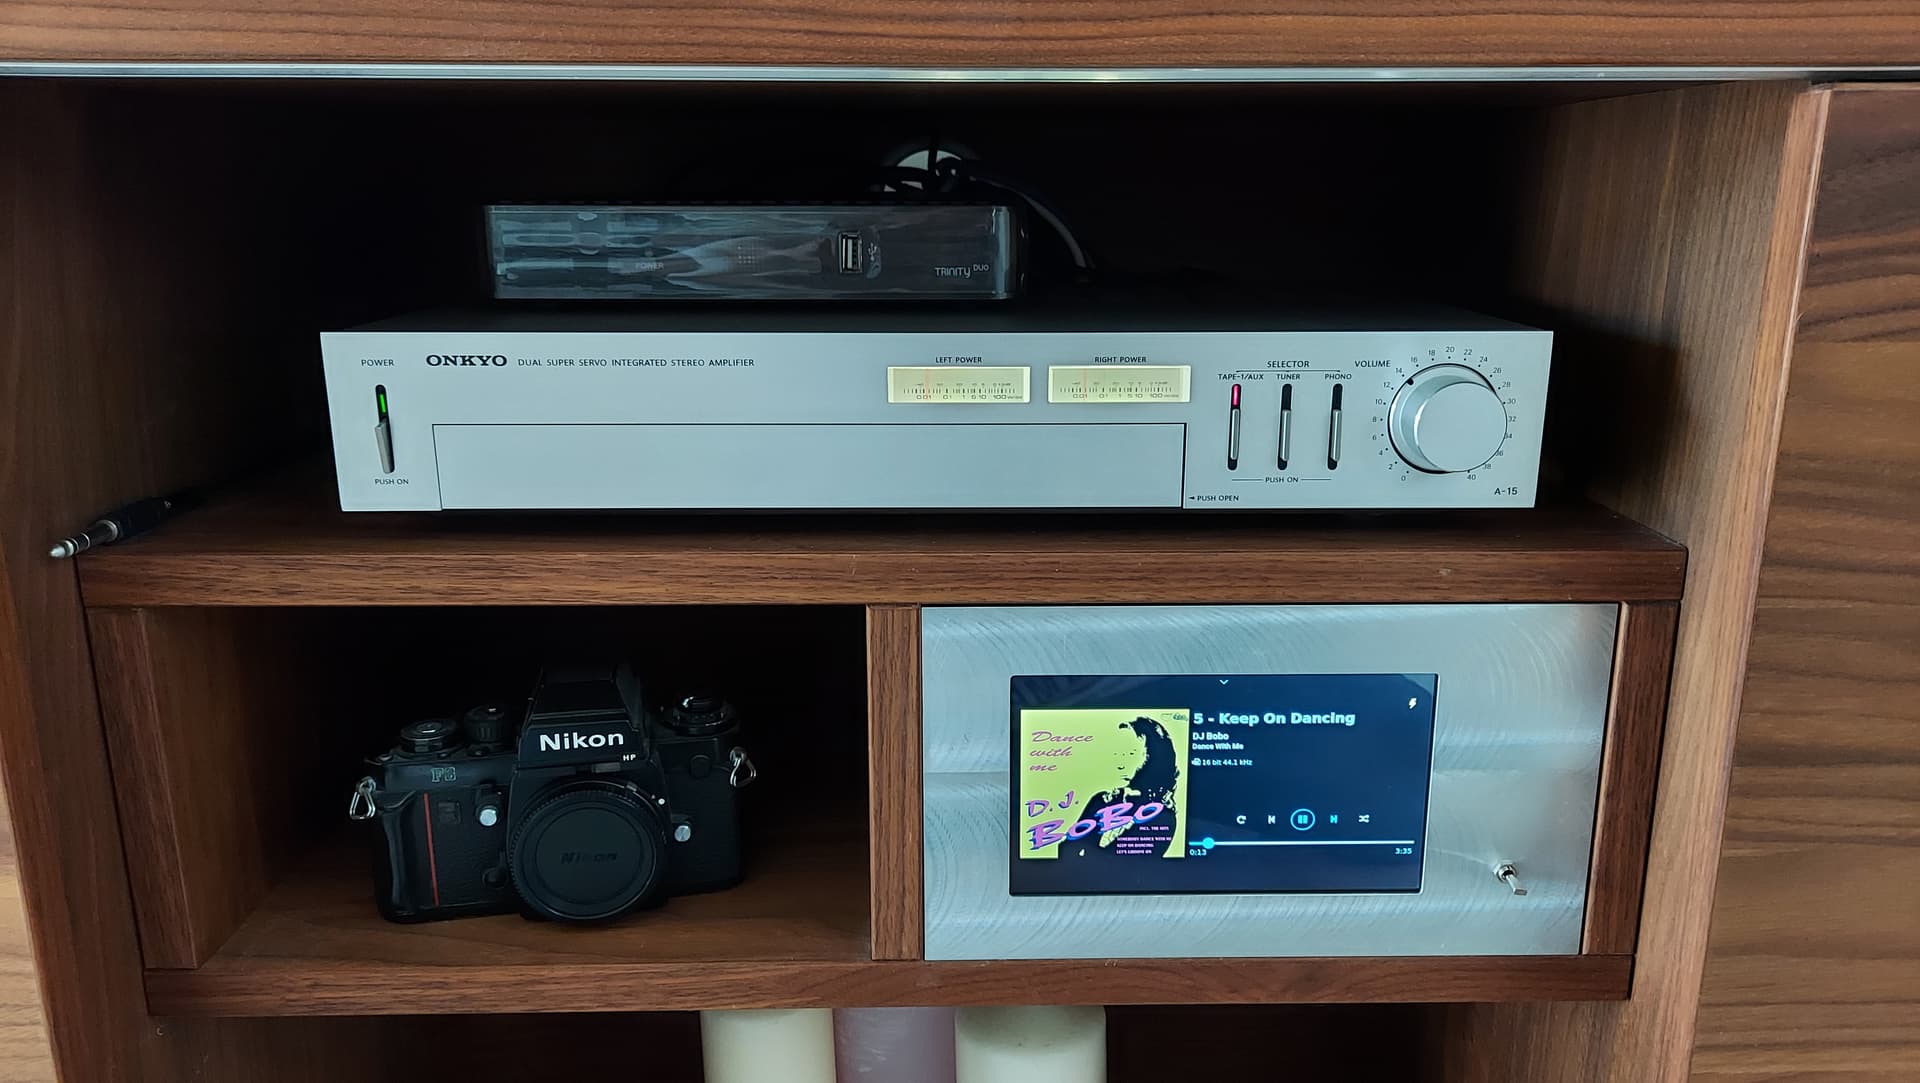
The technical basis is a Rasperry Pi 3b+, a Hifiberry DAC+ Pro and a 256 GB SSD on the Fritzbox. A 7" from Waveshare serves as the display. I use Now Playing and GPIO Buttons as plug-ins. Playback devices are an Onkyo A15 and an AKG 702. All files are stored in Apple Losless (m4a) and tagged with metadatics.
That’s true. We measured it out very exact and have chosen a very thin second depth to keep the display near to the panel. I also thought about putting two leds on the front. which gpio’s did you use to show the power status and what does the second one show? I did not assemble a volume controle since my amp is directly beside the player.
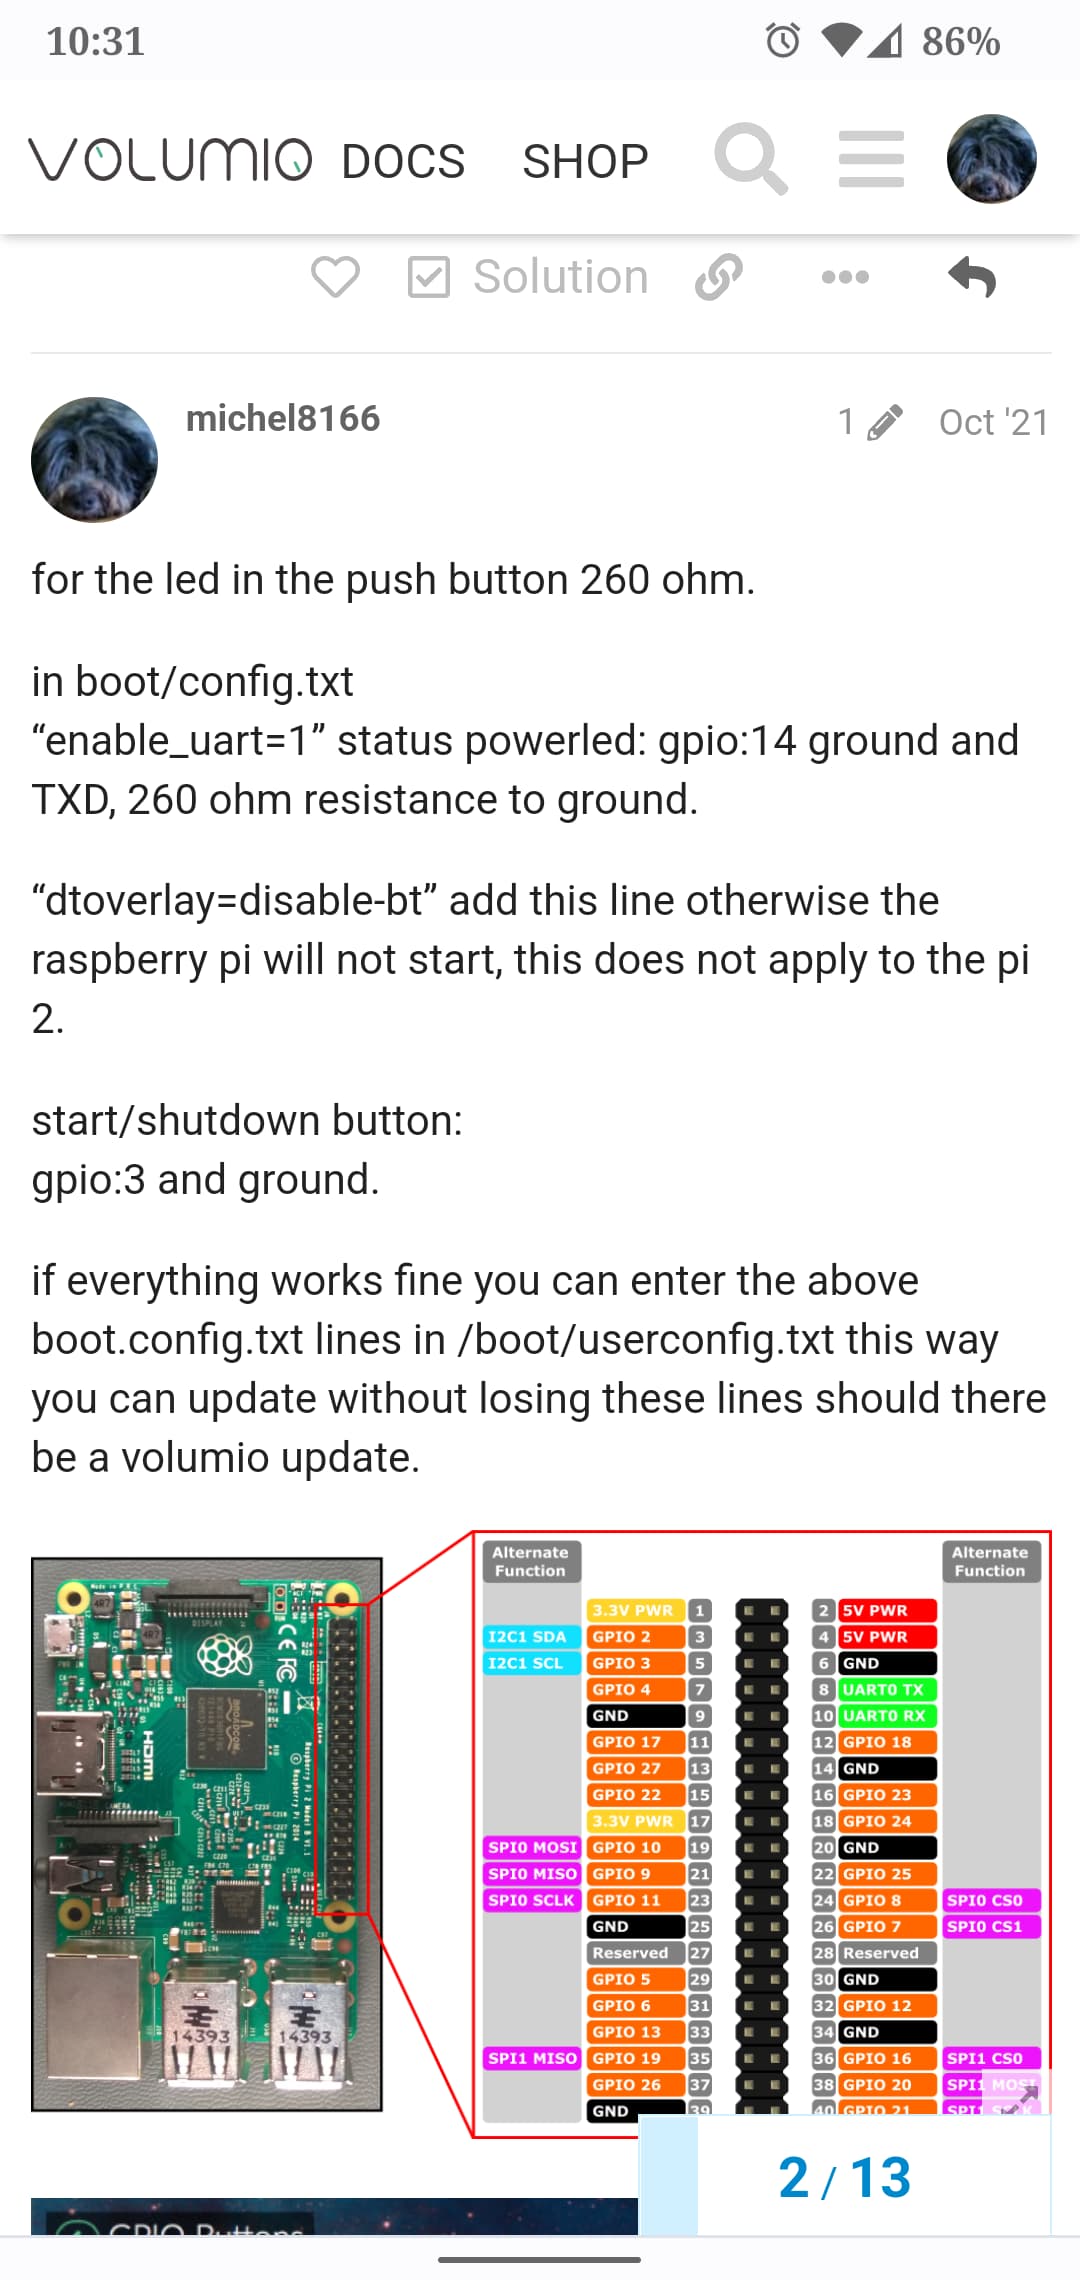
In the streamer that I made for my brother-in-law, I did the LED via the Gpio.
I connected the LED directly to the powersuply in this streamer. but if you check the link and it says somewhere at the bottom how you can do that via the Gpio.
I’ll used this power button with built-in LED.

 . I wanted to keep things simple because my goal was to spend not more than 1k€. But that was already done purchasing RaspDAC, The Pi, PSU, Amp, Transducers & Crossover Parts. So finally It was 500€ additional for “optics & other odds and ends”.
 .
. measured
  I sat down with my colleague
  Enrico
  and we created a simple but well thought-out solution
 mm thick aluminium plate, two pinned stabilising and stop profiles
 , programmed it
  and then milled it on a DMG. Only the threads on which the display
  is attached to its tabs were cut by hand 🫱🫲 afterwards.