The tentacle monster is coming…
I’ve previously posted a bit related of Q&A on the Rune Audio website, but this is my first post to Volumio. Kraken is an idea I had immediately when I came across the Raspberry Pi MPD community, and is really simple, really integrated. It’s not finished yet - raspi i2s, architecture & component placement works for me, but detailed layout artwork, andsome software remain - so I’m putting it out there for comment and advice first. I won’t finish it unless people are interested, so depending on feedback here and @ Rune I’ll kickstart. With a vote of confidence there I’ll finish the system and ship. The goal is a DIY tool that anyone can use to power loud speakers with excellent connectivity, high fidelity and low cost. I will use the system to power some free standing cabinets of my own design, but you could use the system to revive any good system with a broken amp too.
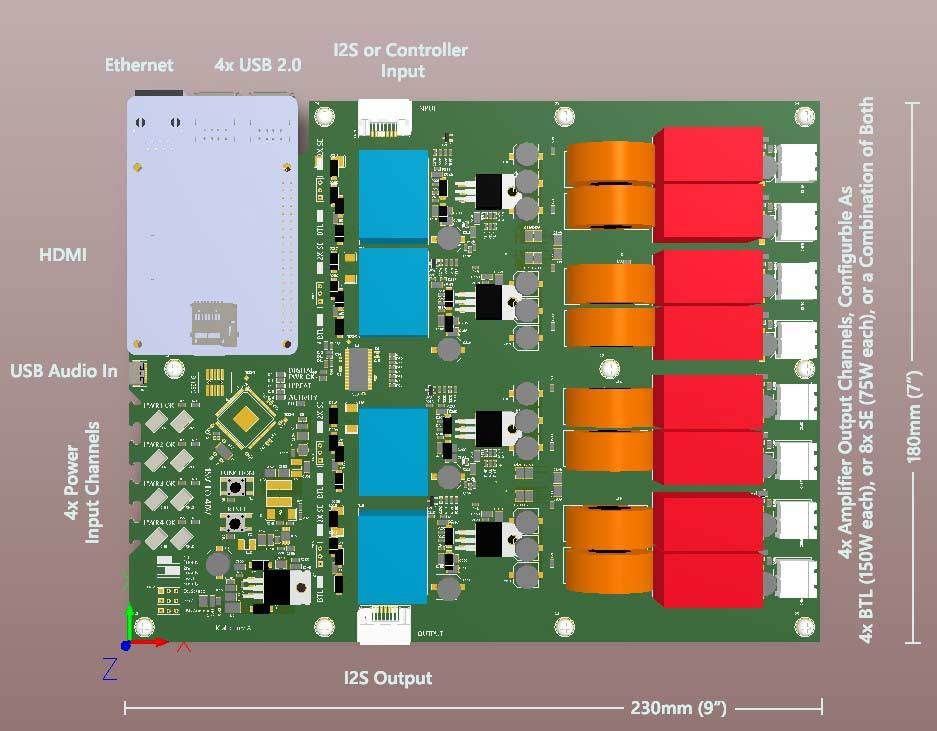
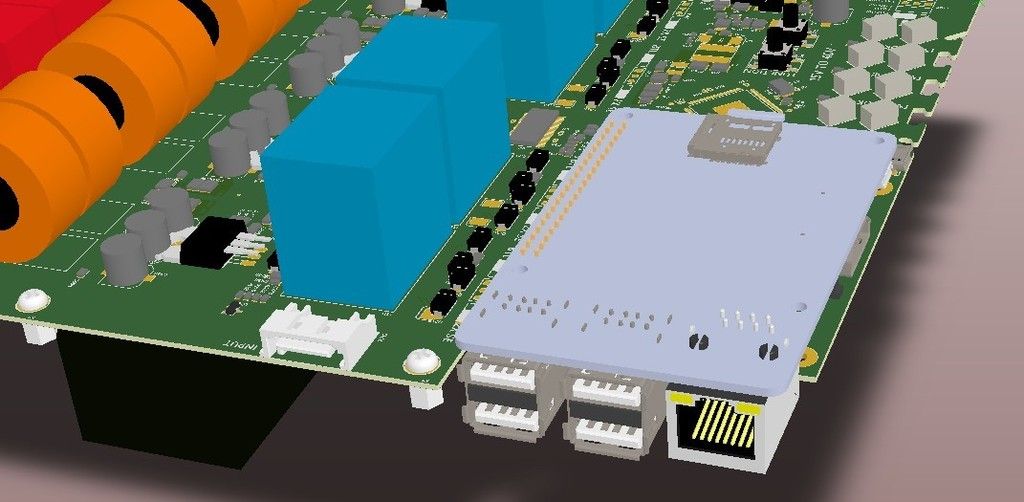
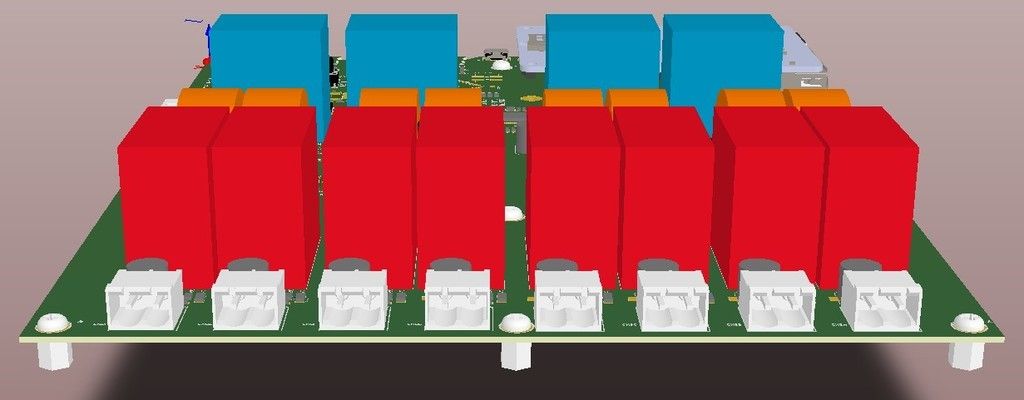
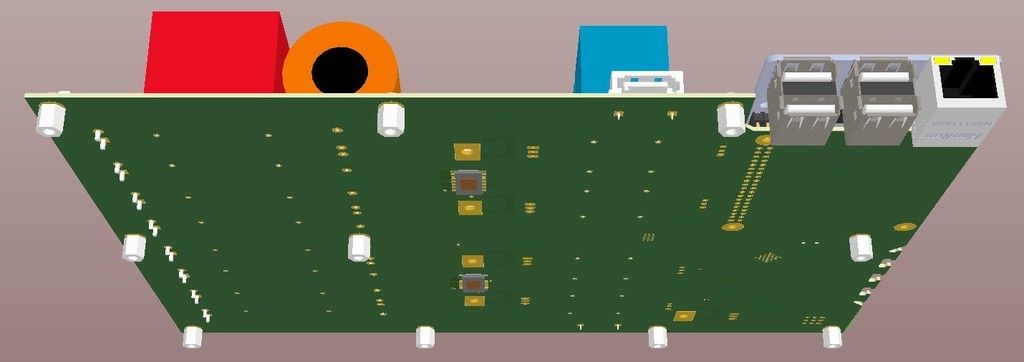
Here’s a 3D Picture:
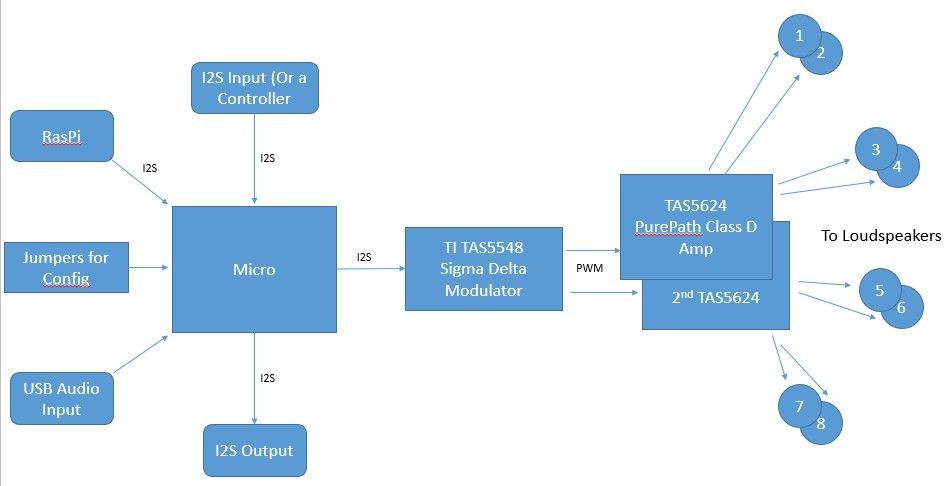
And a Block Diagram:
Features
- Made for Volumio (or Rune)
This project is a big power accessory for your favourite MPD based media player. But doesn’t have to be - I can see people tethering to a PC over USB Audio with no Pi in the system.
With RasPi2 and all the possibilities it brings (like Windows 10  Kraken might morph into a Netflix streaming home theater STB for example.
- Solid HiFi Performance
THD of 0.02% is achievable @60W into a 8Ohm loudspeakers (4x Channels and 240W total). 600W can be delivered to 4Ohm speakers at lower THD.
- Flexible
Configurable for SE (Single Ended) or BTL (Bridge Tied Load), 8 channels or 4 channels respectively, or a combination of both. This would allow a stereo three way speaker cabinet setup with active cross overs, SE for tweet, SE for mid, BTL for bass, fitting nicely in one Kraken system. @ 0.02% THD you’d get 30W, 30W and 60W repectively into 8Ohms each. At maximum power its 75W, 75W, 150W into 4Ohms each.
The outputs are plug/socket terminal blocks, not banana plugs. Cheaper, smaller and easy to terminate.
- Open Source FreeBSD License
I would love to see someone else pick the work up and run when I’m done with it. The whole system will be open source after the Kickstarter is over, funded or otherwise.
- Transparent
Any net revenue will be split 50% back to me for my time and risk, 25% to Rune, 25% to Volumio. Sorry about the split guys, I know you compete but I think both are great efforts/people and don’t prefer to take a side. Competition is good right? I’ll publish a costed BOM for the sake of transparency. Pricing will be cost plus +70%. Why 70%? Protection from returns, cost blow outs, fees, unforeseen bullsh!t. I don’t want to be losing money and there’s lots that can go wrong. It’s a pretty standard markup for Open Source hardware according to google. I also asked Siri about appropriate markup on commodity hardware but she just laughed at me.
- Low Design Risk
The design is based on the TAS5624 + TAS5558 reference board http://www.ti.com/tool/tas5624addvevm. I have it working with RasPi + MPD + I2S and will copy circuit and part selection. The risk in this project is my power input system, mainly the heat load I need to work with from Linear regulators, but also a few other circuits need validation. Software effort is low, as no DSP is required, just house keeping. The power input system is designed to allow recycling of low quality power supplies around your home/office into hifi spec sources.
- Low Cost
I’m aiming at U$400 for a Kraken with no power supply, RasPi and no Heatsink/spreader. Both will be bolt on options in the campaign but add to the shipping cost and are things that each user will want to customize/optimise
- No Analog
It’s a fact that when you keep information digital you don’t lose any quality. Kraken is Digital at all stages until the final power H-Bridge output to a loudspeaker. No quality is lost in ADC or DAC conversions. Stop shaking your head and embrace it.
- A Focus On Recycling Your Office Equipment (for Low Cost)
Laptop Power Supply Friendly
Kraken needs power between 12V and 42V. Wattage depends on your intended use but can be up to 600W albeit with lesser THD numbers. There are four separate inputs for power supplies, one for each output channel, and the goal here is to recycle old laptop power supplies from long dead laptops. There are some linear regulator (active) and filter (passive) electronics on Kraken to stop noise below 20kHz that could be heard in output. Class D amps by their nature reject most of the noise a cheap power supply might generate too. The result is a linear, clean, very low impedance power rail for the Class D Amps, and low/no coupling of undesired signals into your amplified output, at low cost.
This allows an inexpensive HiFi system, as most of the cost of amplifier electronics is in the power supply. If you can’t find one in your desk hit ebay, or consider an option like this http://www.digikey.com/product-detail/en/SWS30036/285-1620-ND/1631787. Power inputs is through these connectors: http://portal.fciconnect.com/Comergent/fci/documentation/datasheet/boardwiretoboard/bwb_griplet.pdf.
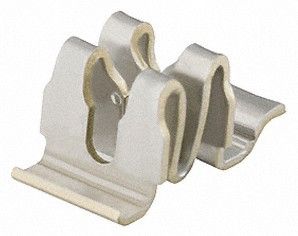
This makes Kraken agnostic of any plug your supply might have. Just cut it off and press the wires into the Griplet IDC recepticles with a flat head screw driver. A full bridge of diodes is include so you don’t need to respect supply polarity, each input connection can be arbitrary. For extra strain relief a tongue beneath each input retains a cable tie that secures wires to the circuit board.
Daisy Chaining Many Krakens Together
I have too many SATA cables in my draw and want them gone. Kraken has an I2S Input and an I2S Output, implmented with SATA connectors and can be extended by daisy chaining with the SATA cables in your draw. You can keep chaining until you run out of power supplies.
DIY Heatsink
The HOT parts are (mainly) on the bottom of the circuit board on their own. This is so you can mount the board on top of any piece of metal without being too worried about size and shape. Where I work there are tons of aluminium blocks and shapes that I can grab and fashion into a DIY heat spreader with the help of a power drill. Easy.
Heatsink on the flat back side allows it to protrude outside a chassis as well, sinking heat into free flowing ambient air while the actual electronics are sheltered.
- Less Software, Intuitive Usage
I hate configuration and setup. Things should just work. The quick start guide needs to be: take Kraken out of packaging, add source, add power, add loudspeakers, done. Anything important can be done with a jumper so the configuration can be seen with the eye.
- Biquad biquads biquads.
The TAS5558 has a ton of features like volume control, biquads, muting, etc. Read the datasheet for detail http://www.ti.com/lit/gpn/tas5558. The kickstarter effort will include an effort to make programming these filters possible (and intuitive) either over USB or through a RasPi method (like UART channel.) Or another way if someone has a good idea here. The main application of biquads would be active cross overs that would really reduce size, weight and cost of a three way system.
- Well Protected
Any inputs you can accidentally touch will be protected from ESD.
- Anyone else got a feature idea? I’d love collaborators on this project.
About me: I’m 34, an Elec Eng and work in Defense electronics. My background is video DSP, design for manufacture and a little marketing too. I have a lot of idle loudspeakers in my basement and want them working in my house. I’m not paid enough to buy good hifi gear so I’ll make some instead.
Please support the project, I think it’ll be awesome.
