[Plugin] GPIO Buttons: Control Volumio 2/ Volumio 3 with buttons

Hey noiprocks, what do you mean by skipping between two playlists?
In general it is easy to add functionality to the plugin if the function already exists in volumio.

To add a function, you have to edit 3 files: index.js, UIConfig.js and config.js. In index.js you have to add the function to the list of actions and add code for the function. In the other two files it’s just adding parameters for the configuration.

Howdy,

Just discovered this plugin, and I’m looking forward to trying it tonight. This looks way simpler than writing my own GPIO button interface, so thanks for your effort and for making it available to the public!

Already I have a feature suggestion: In addition to supporting a momentary button press, it would be really nice to support two-state toggle switch style inputs with a different action for both the “active” and “inactive” GPIO input states. The specific application I’m thinking of would be for a toggle switch that causes a stream to play when it’s flipped one way, and stops the stream when it’s flipped the other way.

I’m converting an old radio into a streaming radio player, and my idea is to repurpose the original chunky power switch as a GPIO input to the Raspberry Pi. The stream will start playing with the switch is flipped to On, and pauses when the switch is flipped to Off. The Pi will remain powered all the time, which will be kinder to it than if I used the power switch to actually turn off its power supply; not to mention, this approach will avoid the delay associated with booting the Pi.

I see how I can add this functionality myself by editing the plugin files, but it seems like it could be a useful addition for others too.

As first many thanks for this very useful plugin.
With my RPI2 and old Volumio 1.55 I used the Gpio5 for power off the system, and it was working with a short script in python.
Now I’m switched to volumio 2.282 and I would like to use this plugin, but after installed it seems doesn’t work …
Plugin GPIO Buttons is active:

but when I open it … nothing is shown:

Please, can someone suggest me what I’m doing wrong?

Many thanks

There is a problem in the latest version. They are trying to fix. It works in the previous version (2.246) and prior.

1 Like

Fixed in 2.285

Hello,

I’m using ordroid C2 with volumio. Installtion of GPIO Buttons was OK. Plugin is activated.
Then I decide to set up hardware and assign buttons to pins.
For each operation I can do enable / disable and I can set pins for them.
But when a I press SAVE button, “sand glass” apear, user interface reload, and nothing saved in GPIO configuration.
Any idea ?

…more info about GPIO configuration save error. journalctl -f show next :

Oct 28 17:46:03 volumio volumio[5782]: info: CoreCommandRouter::getUIConfigOnPlugin
Oct 28 17:46:03 volumio volumio[5782]: info: GPIO-Buttons: Getting UI config
Oct 28 17:46:12 volumio volumio[5782]: info: CALLMETHOD: system_controller gpio-buttons saveConfig [object Object]
Oct 28 17:46:12 volumio volumio[5782]: info: CoreCommandRouter::executeOnPlugin: gpio-buttons , saveConfig
Oct 28 17:46:12 volumio volumio[5782]: info: GPIO-Buttons: Reading config and creating triggers…
Oct 28 17:46:12 volumio volumio[5782]: info: GPIO-Buttons: shutdown on pin 18
Oct 28 17:46:12 volumio volumio[5782]: fs.js:787
Oct 28 17:46:12 volumio volumio[5782]: return binding.writeBuffer(fd, buffer, offset, length, position);
Oct 28 17:46:12 volumio volumio[5782]: ^
Oct 28 17:46:12 volumio volumio[5782]: Error: ENODEV: no such device, write
Oct 28 17:46:12 volumio volumio[5782]: at Error (native)
Oct 28 17:46:12 volumio volumio[5782]: at Object.fs.writeSync (fs.js:787:20)
Oct 28 17:46:12 volumio volumio[5782]: at Object.fs.writeFileSync (fs.js:1357:24)
Oct 28 17:46:12 volumio volumio[5782]: at new Gpio (/data/plugins/system_controller/gpio-buttons/node_modules/onoff/onoff.js:88:8)
Oct 28 17:46:12 volumio volumio[5782]: at /data/plugins/system_controller/gpio-buttons/index.js:185:12
Oct 28 17:46:12 volumio volumio[5782]: at Array.forEach (native)
Oct 28 17:46:12 volumio volumio[5782]: at GPIOButtons.createTriggers (/data/plugins/system_controller/gpio-buttons/index.js:176:10)
Oct 28 17:46:12 volumio volumio[5782]: at GPIOButtons.saveConfig (/data/plugins/system_controller/gpio-buttons/index.js:165:14)
Oct 28 17:46:12 volumio volumio[5782]: at CoreCommandRouter.executeOnPlugin (/volumio/app/index.js:973:29)
Oct 28 17:46:12 volumio volumio[5782]: at Socket. (/volumio/app/plugins/user_interface/websocket/index.js:523:38)
Oct 28 17:46:12 volumio systemd[1]: volumio.service: main process exited, code=exited, status=1/FAILURE
Oct 28 17:46:12 volumio systemd[1]: Unit volumio.service entered failed state.

… and volumio UI restarts …

Native ( downloaded, installed) GPIO Buttons plugin newer will work on odroid C2 running volumio.

In details:

  1. Different port numbering : PI using port numbers 2, 3, … 26, 27. odroid C2 does not have these ports. It’s port numbers are between 205 and 249 ( but not all numbers). See here : wiki.odroid.com/odroid-c2/hardw … connectors. (Translation between wiringPI port numbers and odroid C2 numbers is done by using previous table.)

  2. Not all odroid C2 port numbers can be used. Some of them are used by another devices by default. Free port numbers are : 214, 219, 225, 228, 231, 233, 236, 237, 239 and 247

  3. It is not possible to use all GPIO Buttons function at same time ( Play/Pause, Next, Prev, Vol+, Vol-, Power). GPIO Buttons use onoff node library. See here : wiki.odroid.com/odroid-c2/appli … e/gpio/irq.

  4. odroid C2 use 2 interrupts for SD CARD detection, and for rising and falling edge detection is needed separate IRQ. Simple mathematics is next : 8 - 2 = 6, 6 / 2 => 3 GPIO buttons can be active at same time.

  5. Unfortunatally on my setup I can use only 2 buttons - not enough IRQ … I need to do some deeper investigation.

  6. To use GPIO Button on odroid C2, UIConfig.json and config.json need to have some modification. They are located here : /data/plugins/system_controller/gpio-buttons

  7. config.json

{ "playPause":{ "enabled": {"value": true, "type": "boolean"}, "pin": {"value": 214,"type":"number"}, "value": {"value": 0, "type": "number"} }, "volumeUp":{ "enabled": {"value": false, "type": "boolean"}, "pin": {"value": 219,"type":"number"}, "value": {"value": 0, "type": "number"} }, "volumeDown":{ "enabled": {"value": false, "type": "boolean"}, "pin": {"value": 225,"type":"number"}, "value": {"value": 0, "type": "number"} }, "previous":{ "enabled": {"value": false, "type": "boolean"}, "pin": {"value": 228,"type":"number"}, "value": {"value": 0, "type": "number"} }, "next":{ "enabled": {"value": true, "type": "boolean"}, "pin": {"value": 231,"type":"number"}, "value": {"value": 0, "type": "number"} }, "shutdown":{ "enabled": {"value": false, "type": "boolean"}, "pin": {"value": 233,"type":"number"}, "value": {"value": 0, "type": "number"} } }

  1. UIConfig.json

[code]{
“page”: {
“label”: “GPIO Buttons”
},
“sections”: [
{
“id”: “gpio_setup”,
“element”: “section”,
“label”: “Setup your GPIO button actions”,
“icon”: “fa-plug”,
“onSave”: {“type”:“controller”, “endpoint”:“system_controller/gpio-buttons”, “method”:“saveConfig”},
“saveButton”: {
“label”: “Save”,
“data”: [
“playPauseEnabled”,
“playPausePin”,
“volumeUpEnabled”,
“volumeUpPin”,
“volumeDownEnabled”,
“volumeDownPin”,
“previousEnabled”,
“previousPin”,
“nextEnabled”,
“nextPin”,
“shutdownEnabled”,
“shutdownPin”
]
},
“content”: [
{
“id”: “playPauseEnabled”,
“element”: “switch”,
“label”: “Enable Play/pause”,
“value”: true
},
{
“id”: “playPausePin”,
“element”: “select”,
“label”: “GPIO Pin”,
“value”: {“value”: 214,
“label”: “214”
},

      "options": [
        {
          "value": 214,
          "label": "214"
        },
        {
          "value": 219,
          "label": "219"
        },
        {
          "value": 225,
          "label": "225"
        },
        {
          "value": 228,
          "label": "228"
        },
        {
          "value": 231,
          "label": "231"
        },
        {
          "value": 233,
          "label": "233"
        },
        {
          "value": 236,
          "label": "236"
        },
        {
          "value": 237,
          "label": "237"
        },
        {
          "value": 239,
          "label": "239"
        },
        {
          "value": 247,
          "label": "247"
        }
      ],
      "visibleIf": {
        "field": "playPauseEnabled",
        "value": true
      }
    },
    {
      "id": "volumeUpEnabled",
      "element": "switch",
      "label": "Enable Vol+",
      "value": false
    },
    {
      "id": "volumeUpPin",
      "element": "select",
      "label": "GPIO Pin",
      "value": {"value": 219,
                "label": "219"
      },

      "options": [
        {
          "value": 214,
          "label": "214"
        },
        {
          "value": 219,
          "label": "219"
        },
        {
          "value": 225,
          "label": "225"
        },
        {
          "value": 228,
          "label": "228"
        },
        {
          "value": 231,
          "label": "231"
        },
        {
          "value": 233,
          "label": "233"
        },
        {
          "value": 236,
          "label": "236"
        },
        {
          "value": 237,
          "label": "237"
        },
        {
          "value": 239,
          "label": "239"
        },
        {
          "value": 247,
          "label": "247"
        }
      ],
      "visibleIf": {
        "field": "volumeUpEnabled",
        "value": true
      }
    },
    {
      "id": "volumeDownEnabled",
      "element": "switch",
      "label": "Enable Vol-",
      "value": false
    },
    {
      "id": "volumeDownPin",
      "element": "select",
      "label": "GPIO Pin",
      "value": {"value": 225,
                "label": "225"
      },

      "options": [
        {
          "value": 214,
          "label": "214"
        },
        {
          "value": 219,
          "label": "219"
        },
        {
          "value": 225,
          "label": "225"
        },
        {
          "value": 228,
          "label": "228"
        },
        {
          "value": 231,
          "label": "231"
        },
        {
          "value": 233,
          "label": "233"
        },
        {
          "value": 236,
          "label": "236"
        },
        {
          "value": 237,
          "label": "237"
        },
        {
          "value": 239,
          "label": "239"
        },
        {
          "value": 247,
          "label": "247"
        }
      ],
      "visibleIf": {
        "field": "volumeDownEnabled",
        "value": true
      }
    },
    {
      "id": "previousEnabled",
      "element": "switch",
      "label": "Enable Previous",
      "value": false
    },
    {
      "id": "previousPin",
      "element": "select",
      "label": "GPIO Pin",
      "value": {"value": 228,
                "label": "228"
      },

      "options": [
        {
          "value": 214,
          "label": "214"
        },
        {
          "value": 219,
          "label": "219"
        },
        {
          "value": 225,
          "label": "225"
        },
        {
          "value": 228,
          "label": "228"
        },
        {
          "value": 231,
          "label": "231"
        },
        {
          "value": 233,
          "label": "233"
        },
        {
          "value": 236,
          "label": "236"
        },
        {
          "value": 237,
          "label": "237"
        },
        {
          "value": 239,
          "label": "239"
        },
        {
          "value": 247,
          "label": "247"
        }
      ],
      "visibleIf": {
        "field": "previousEnabled",
        "value": true
      }
    },
    {
      "id": "nextEnabled",
      "element": "switch",
      "label": "Enable Next",
      "value": true
    },
    {
      "id": "nextPin",
      "element": "select",
      "label": "GPIO Pin",
      "value": {"value": 231,
                "label": "231"
      },

      "options": [
        {
          "value": 214,
          "label": "214"
        },
        {
          "value": 219,
          "label": "219"
        },
        {
          "value": 225,
          "label": "225"
        },
        {
          "value": 228,
          "label": "228"
        },
        {
          "value": 231,
          "label": "231"
        },
        {
          "value": 233,
          "label": "233"
        },
        {
          "value": 236,
          "label": "236"
        },
        {
          "value": 237,
          "label": "237"
        },
        {
          "value": 239,
          "label": "239"
        },
        {
          "value": 247,
          "label": "247"
        }
      ],
      "visibleIf": {
        "field": "nextEnabled",
        "value": true
      }
    },
    {
      "id": "shutdownEnabled",
      "element": "switch",
      "label": "Enable Shutdown",
      "value": false
    },
    {
      "id": "shutdownPin",
      "element": "select",
      "label": "GPIO Pin",
      "value": {"value": 233,
                "label": "233"
      },
      "options": [
        {
          "value": 214,
          "label": "214"
        },
        {
          "value": 219,
          "label": "219"
        },
        {
          "value": 225,
          "label": "225"
        },
        {
          "value": 228,
          "label": "228"
        },
        {
          "value": 231,
          "label": "231"
        },
        {
          "value": 233,
          "label": "233"
        },
        {
          "value": 236,
          "label": "236"
        },
        {
          "value": 237,
          "label": "237"
        },
        {
          "value": 239,
          "label": "239"
        },
        {
          "value": 247,
          "label": "247"
        }
      ],
      "visibleIf": {
        "field": "shutdownEnabled",
        "value": true
      }
    }
  ]
}

]
}
[/code]

  1. Finally. I hope that this can help odroid C2 fans tu use GPIO Buttons …

Hi totyc

This plugin was made for the raspberry pi. Is it listed as a plugin in the volumio plugin list on the odroid?

If you have figured out how to get the plugin to work with odroid, I would suggest making a fork of the plugin for odroid.

Hello, thank you for this plugin!

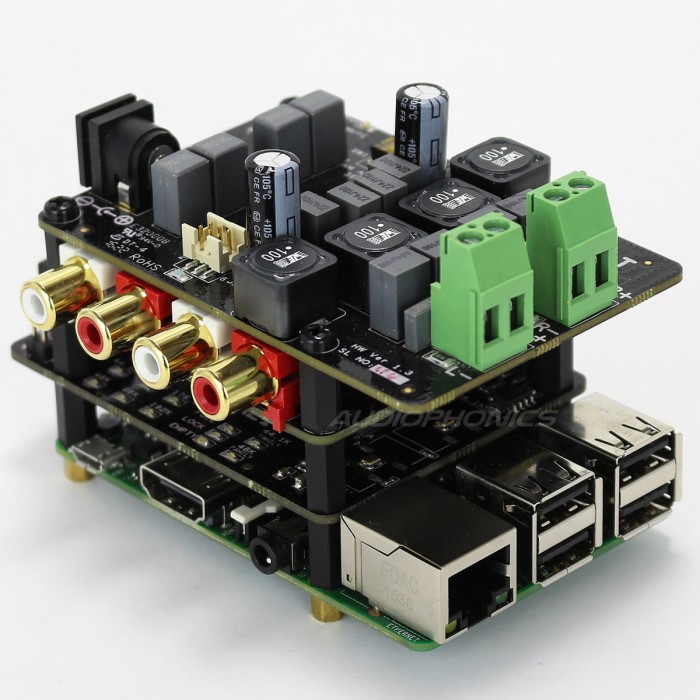
The question may be silly, but I use a RPI3 with Allo Boss DAC and Allo Volt amp. I don’t see any available GPIO anymore. Is there a possibility to connect buttons? How should I do?

Following Allo’s specification, I understand that these pins are used by the Boss: physical pins 3-5-12-27-28-31-35-40 (SDA1-I2C ; SCL1-I2C ; 2S_BCLK ; ID_SD ; ID_SC ; GPIO6/DMUTE ; I2S_LRCLK ; I2S_DOUT).

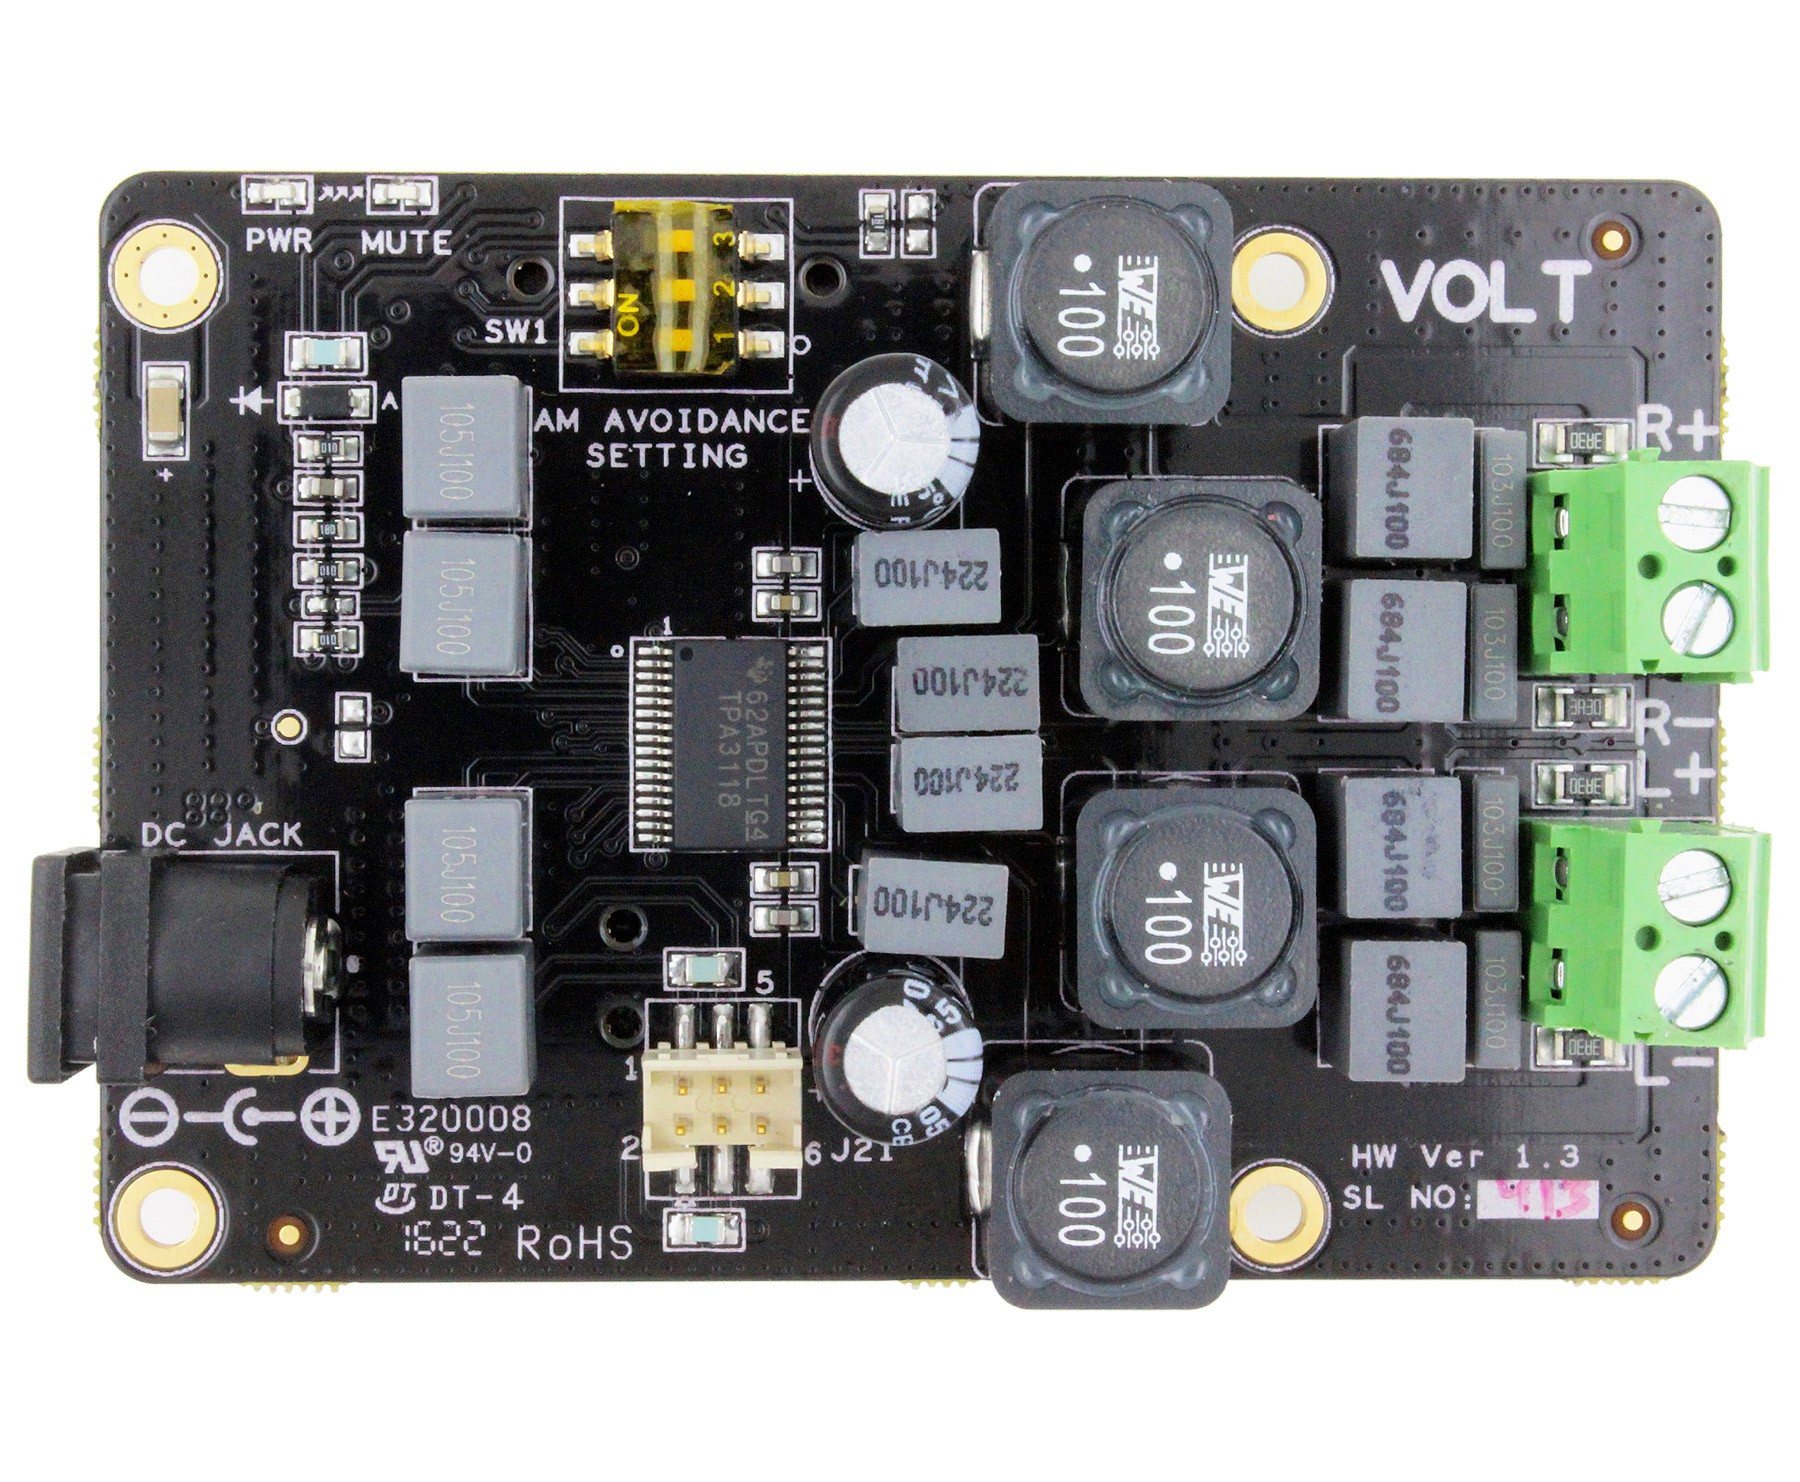
And then I understand that the Volt uses the outgoing pins from the Boss in addition to physical pins 15-16 (GPIO22 and GPIO23)

The specs are here:

And last question: do you still plan to integrate the support for rotary encoder to control volume?

Thank you very much for your help.

What do you mean “you don’t see any GPIO available anymore”? Where is what missing?

The plugin doesn’t know if other components are using specific GPIO pins. If you try to use the same pins in the plugin you will likely get errors.

I would like to improve the plugin and rotary encoders are definitely on the list of improvements. Unfortunately I do not have the time to improve the plugin at this time. The source is on github and anyone can improve upon it.

Hello, thank you for your quick reply.

I mean that there’s no pin available anymore: the DAC is plugged on the RPI’s pins, and the amp is plugged on the DAC’s pins. Is there a way to use not-used pins anyway? It looks something like this:

and the Volt looks like this:

Oh, the physical pins. I have no experience with those boards. Maybe someone else on this forum knows the answer, or if there is a forum for the specific board?

Thank you, I asked the question there: help-with-gpio-buttons-and-allo-boss-dac-t7354.html#p40452

For the record, @cldebuhr (thank you again) made a perfect answer here: https://community.volumio.com/t/help-with-gpio-buttons-and-allo-boss-dac/6657/5

Hi,

I´m on Pi Zero W with Volumio 2.323 working and want to use GPIO buttons.
I installed the NanoSound Plugin by nanomesher which is based on this GPIO Buttons Plugin.

The buttons are fixed to GPIO 9,10,11,12,13,16.
nanomesher.com/nanosound-gpio-usage/
Buttons GPIO 12,13,16 work like a charme for play/pause, previous and next.

I want to add/replace the function stop, fastforward and rewind to pin 9,10 and 11.

These function still exist in volumio:
volumio stop
volumio seek plus
volumio seek minus

But which files do I have to modify to change the action according the button ?

THX for ur help,
kind regards,
Michael

Hi Michael

As you say the NanoSound Plugin is only based on my plugin. I have never heard of that plugin before - and hence I have no idea how much has been changed. It is a bit hard for me to answer your question.

Do you have the source for the NanoSound plugin?
Did you try to use the GPIO Buttons plugin instead? Or does the NanoSound plugin have some additional functionality?

Regards
tomatpasser

2 Likes

Hi tomatpasser,

thanks for your quick reply, the source could be found here:

github.com/nanomesher/Nanomeshe … mio_plugin

But it would be a great help, if you could explain your plugin - perhaps I can transfer it !
According your plugin (github.com/tomatpasser/gpio-but … io-buttons)

I don´t have a clue how it works :frowning:
Which files are important, where are they placed @volumio ??

UIconfig - seems to be the UserInterface for the plugin
config.json - seems to be the file I need to edit

  • which is the right folder on my pi to place it?
  • what does this file do ?
    example:

“volumeUp”:{
“enabled”: {“value”: false, “type”: “boolean”},
“pin”: {“value”: 18,“type”:“number”},
“value”: {“value”: 0, “type”: “number”}
},

does ist connect GPIO 18 to volumeUp ? Is it pin 18 or GPIO 18 ?

index.js - don´t have a clue what´s this

Thanks for your help,
kind regards,
Michael

Which platform are you on? You should be able to install GPIO Buttons plugin from within volumio. Then you can configure the buttons manually in the config…

I looked at the nanosound plugin. It is basically “GPIO Buttons”, but with the pin numbers hardcoded and added all their OLED and IR remote stuff.
You will probably have problems if you try to use both the NanoSound plugin and the GPIO Buttons plugin, because of conflicts on the GPIO pins they are trying to listen on.

You could try and edit the hardcoding in the NanoSound plugin to your liking.

Hi tomatpasser,

thx for you reply. Have you located the file with the hardcoded gpio in the nanomesher release ?

Where does your plugin store the configuration ?

Kind regards,
Michael

1 Like