Inspired by a runeaudio project I decided to build my diy player into a vintage tape deck:
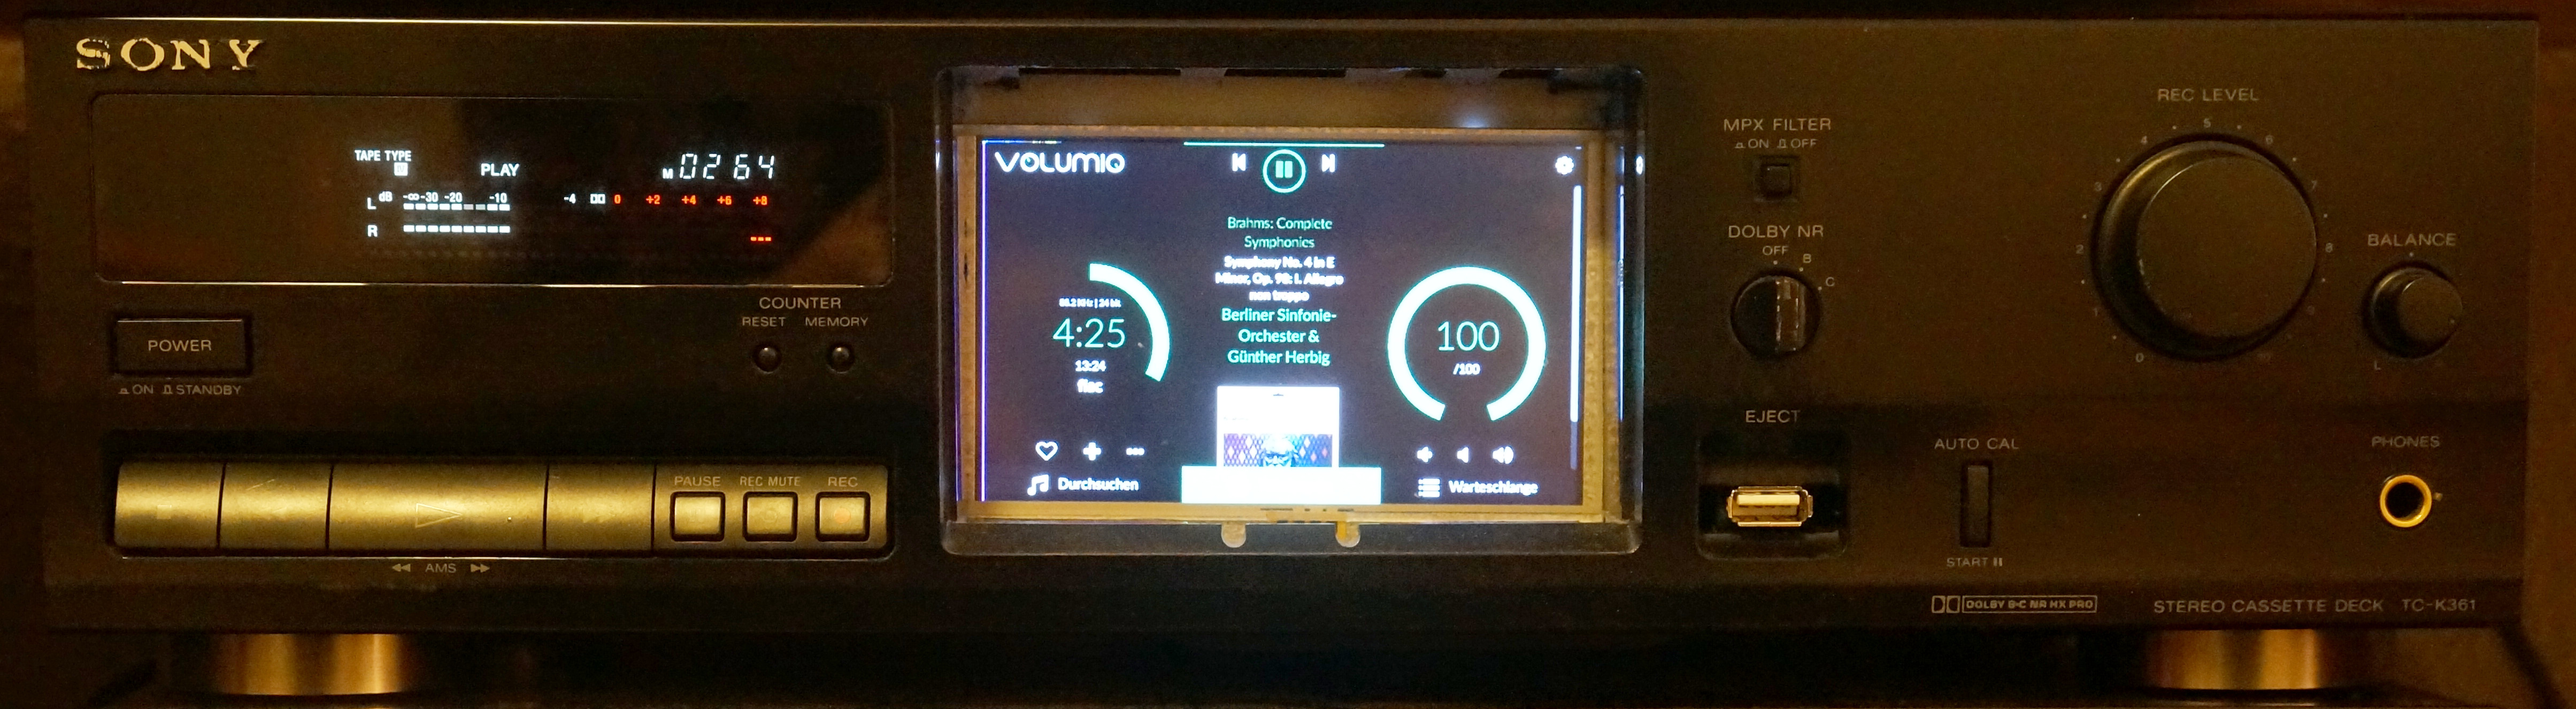
Of course the peak level vfd display works as well as some of the buttons which control the player. As you can see even the tape counter works (just counting seconds). I think the volumio UI fits well in the tape deck environment because it reminds a bit to cassette tape (at least to me).
Inside is a raspberry pi 3 with a Hifiberry DACPro+. The display is a well working 5" resistive touch screen (the “real one”, I forgot the name). It is just temporarily fixed and still needs some finish. The player also features an USB connector.
Congratulations very beautiful! For my design i wanted a 5 "lcd touch, can you tell me the model and tell me if it works well with fingers (being resistive) on volumio interface?
I’m sorry for my english…
@gvstorm: I used the Waveshare 5" display. It comes with a pen, but can also be used with fingers.
Unfortunately, volumio is not really optimized for this size as you can see in the picture:
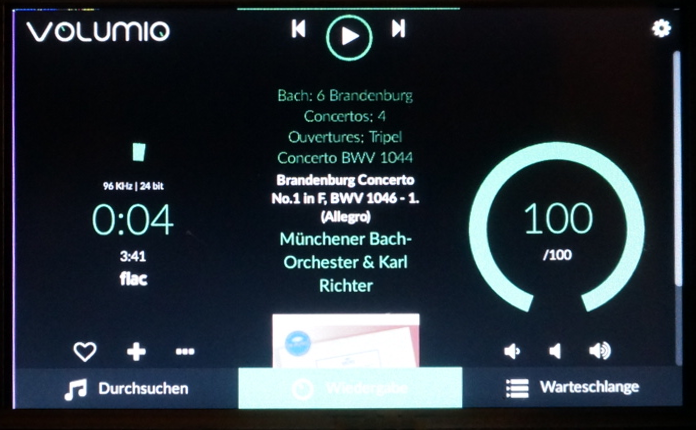
Any idea how to fix that?
Wow – Fantastic job…
You – Sir…Are a genius and have inspired me to want to build one for myself.
Would you be willing to share any technical details with me like what method did you use to interface with the existing display and buttons?
I do have an electronics background and would love to hear more.
Cheers,
Kelly
@Kelly: it makes me happy that I could inspire you … Believe me, this project has been really fun so far!
I bought a Sony TC-K361 at ebay. It fits very well to my other Hifi components which are from the same series of the 90s too  And it has electrical Buttons which can more easily be used to operate volumio.
You will find many devices there, most of them with broken tape drives, but I stripped the tape drive anyway.
I found a service manual with a circuit diagram at hifiengine.com/manual_libra … k361.shtml
The VFD display is actually a tube matrix which I found hard to interface. So I decided to leave the original mainboard and power supply inside and let the tape deck’s circuit do the work. I just had to lead in the audio signal at the right place. This place was easy to find - just before the meter amplifier (logarithmizer). I soldered out a condensor on each channel (red crosses) which connected the preceding components to the logarithmizer and I connected the output of the Hifiberry DAC to the input of the logarithmizer (red lines):
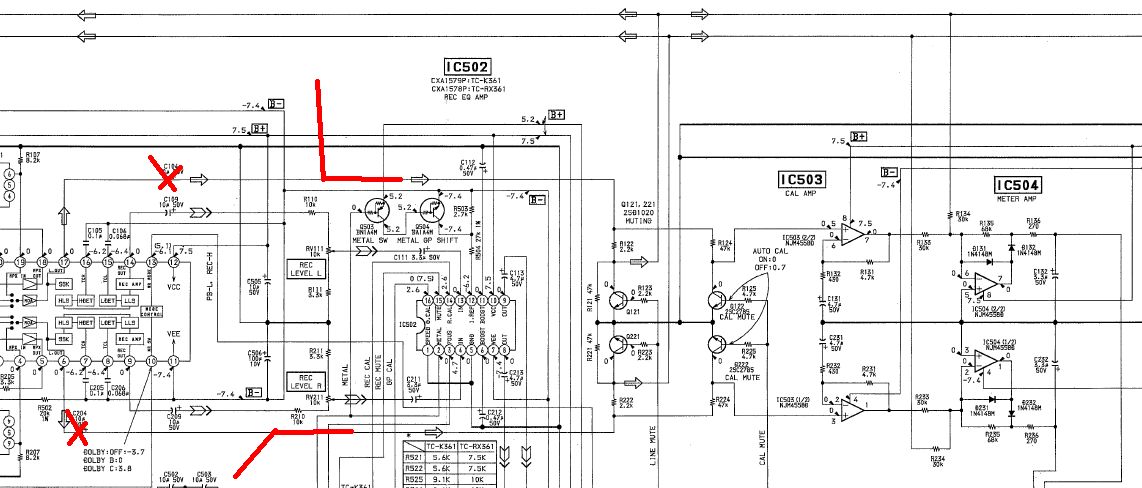
Now it worked basically, but only if I pressed the record button before. I found out that I had to make the tape deck’s circuit believe that there is a running tape in order to activate the peak level display automatically (btw, soldering out the transistors Q121 and Q221 did not help). In it’s normal environment this task will be done by a optocoupler which is supposed to recognize if the tape is running (the optocoupler is part of the tape drive and was stripped off with the drive) .The solution was pretty easy: I connected a GPIO to the mainboard’s terminal where the optocoupler’s transistor is supposed to be and switched the GPIO on and off every second by software. Et voilà - the peak level display works without having to press the record button. As a side effect I have the working tape counter - it counts seconds now  .
.
Now I came to the buttons. They are connected in a way that a different voltage is reported to the tape deck’s circuit depending on which button is pressed (red lines). This is done by a series connection of resistors. The buttons shortcut the particular nodes to ground if pressed:
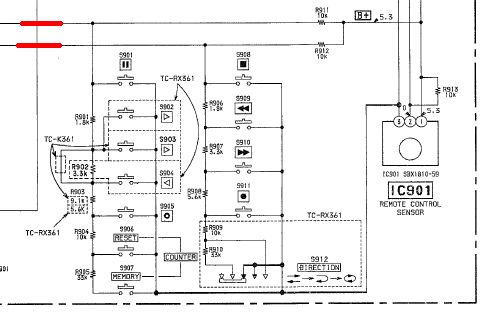
My current solution is simple: I connected the particular nodes to corresponding GPIO. Since the buttons shortcut to ground I have a “Low” condition if pressed and the resistors pull the GPIO up to 5V if no button is pressed. The problem is that if I press an upper button all lower buttons in the diagram do also have a “Low” condition (still something I have to work around).
I didn’t use the volumio plugin to control the system by the buttons. I wrote a shell script instead which reads the button’s states and simulates the “running tape”. It controls Volumio using the REST API. The shell script runs in an endless loop and it is started automatically when Volumio is booted. So I can read the button’s states and also can “press” the buttons to control the tape deck’s circuit by software. This way, the VFD display shows always “Play” if the music plays, no matter if I started playing by a button or by the touch display or using the Webapp (the same with “Pause”). The tape counter is counting if the music plays and it stops counting if the music is stopped or paused.
My next step is making the IR remote control work.
I Hope I could help. The things work as described for me, it may be different with other devices.
paganini
Thank you Paganini for taking the time to respond to me.
I really appreciate the schematic with mods and excellent instructions.
I have a Sony A7 DAT that I might try to use.
I was thinking about trying to interface with the DAC but I have read that the Sony DAC is probably not that good so I will just have to try it i guess.
Thanks again for your prompt response,
Regards,
Kelly
@Kelly: really promising project, I would like to read if there is any progress
The buttons may work similar to my tape deck, as well as interfacing the main circuit (if you decide not to use the Sony DAC).
-paganini