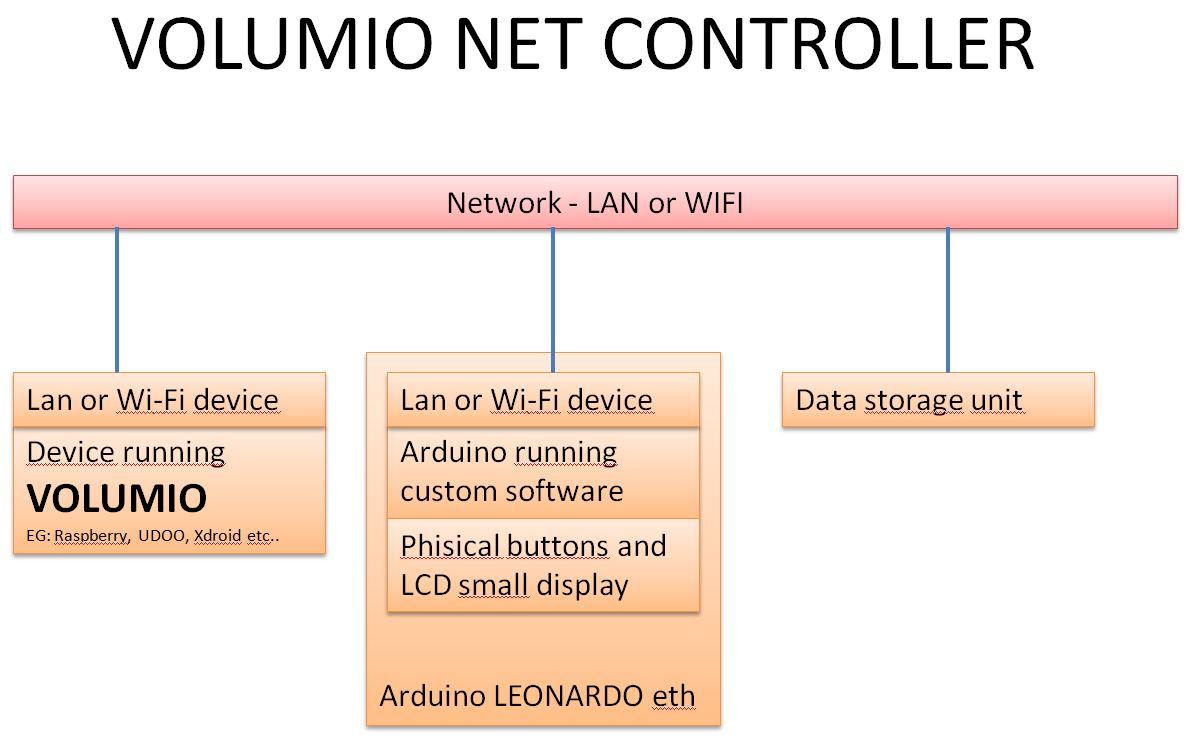
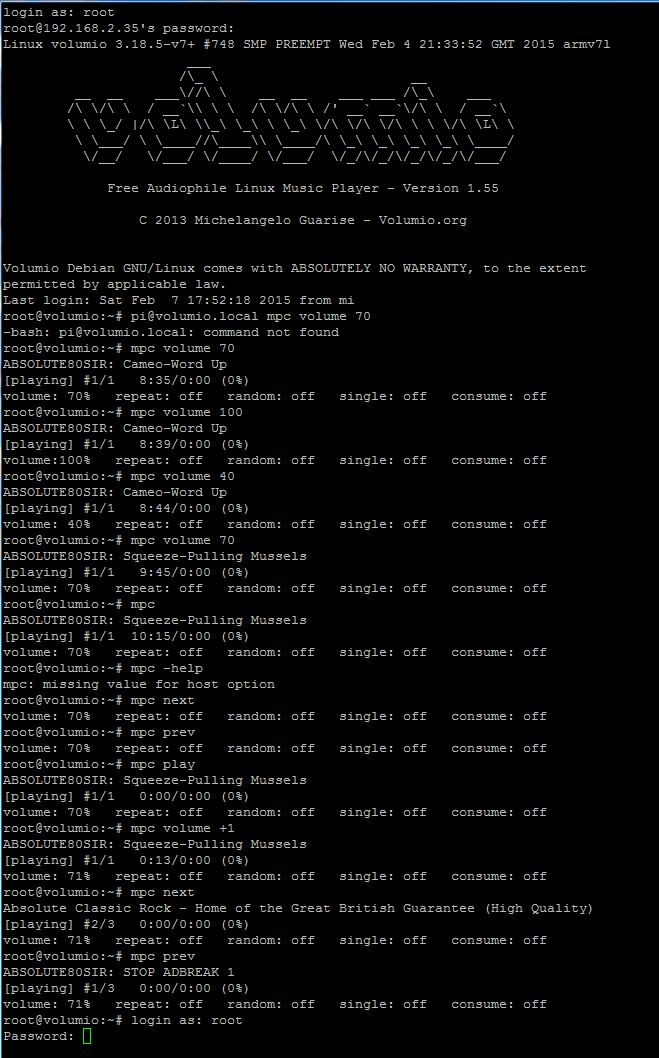
Thank you again, but your link is concerning arduino YUN, that can run LINUX.
My arduino have a really little “power” and seems there is not any way to implement the SSH protocol.
so, I decided to switch to a simplest way, I’m going to use Http calls:
Following some other example of code I found how to up and down the volume (+2 and -2 are the steps, can be adjusted as you like):
client.println("GET /command/?cmd=volume%20+2");
client.println("GET /command/?cmd=volume%20-2");
The triky thing is that you need to re-estabilish the communication with VOLUMIO before each call.
This is the complete sketch actually working fine (need to be cleaned, but working perfectly) 


 :
:
[code]
#include <SPI.h>
#include <Ethernet2.h>
int comando = 0;
int VolUP = 3;
int VolDW = 4;
int NextSong = 5;
int PrevSong = 6;
int VolUP_state;
int VolDW_state;
int NextSong_state;
int PrevSong_state;
int last_VolUP_state;
int last_VolDW_state;
int last_NextSong_state;
int last_PrevSong_state;
// Enter a MAC address for your controller below.
// Newer Ethernet shields have a MAC address printed on a sticker on the shield
byte mac[] = { 0xDE, 0xAD, 0xBE, 0xEF, 0xFE, 0xED };
// if you don’t want to use DNS (and reduce your sketch size)
IPAddress volumio(192, 168, 2, 35); // name address for VOLUMIO
// Set the static IP address to use if the DHCP fails to assign
IPAddress ip(192, 168, 2, 100);
// Initialize the Ethernet client library
// with the IP address and port of the server
// that you want to connect to (port 80 is default for HTTP):
EthernetClient client;
String serialstring;
void setup() {
pinMode(VolUP, INPUT);
pinMode(VolDW, INPUT);
pinMode(NextSong, INPUT);
pinMode(PrevSong, INPUT);
// Open serial communications and wait for port to open:
Serial.begin(9600);
Serial.println("-- VOLUMIO NET CONTROLLER --");
// start the Ethernet connection:
if (Ethernet.begin(mac) == 0) {
Serial.println(“Failed to configure Ethernet using DHCP”);
// no point in carrying on, so do nothing forevermore:
// try to congifure using IP address instead of DHCP:
Ethernet.begin(mac, ip);
}
// give the Ethernet shield a second to initialize:
delay(1000);
Serial.println(“connecting…”);
// if you get a connection, report back via serial:
if (client.connect(volumio, 80)) {
Serial.println(“connected”);
// Make a HTTP request:
}
else {
// kf you didn’t get a connection to the server:
Serial.println(“connection failed”);
}
}
void loop()
{
// Verifico stato bottoni
VolUP_state = digitalRead(VolUP);
VolDW_state = digitalRead(VolDW);
NextSong_state = digitalRead(NextSong);
PrevSong_state = digitalRead(PrevSong);
if ( VolUP_state != last_VolUP_state ||
VolDW_state != last_VolDW_state ||
NextSong_state != last_NextSong_state ||
PrevSong_state != last_PrevSong_state
){
       if (VolUP_state == HIGH) { comando = 1;}
       if (VolDW_state == HIGH) { comando = 2;}
       if (NextSong_state == HIGH) { comando = 3;}
       if (PrevSong_state == HIGH) { comando = 4;}
       ListaComandi(comando);
         if (client.available())
         {
              char c = client.read();
              Serial.print(c);
         }
     }

       last_VolUP_state = VolUP_state;
       last_VolDW_state = VolDW_state;
       last_NextSong_state = NextSong_state;
       last_PrevSong_state = PrevSong_state;
if (!client.connected()) {
Serial.println();
Serial.println(“Server disconnected try to connect again”);
client.stop();
// if there’s a successful connection:
if (client.connect(volumio, 80))
{
Serial.println(“connecting…”);
}
else
{
// if you couldn’t make a connection:
Serial.println(“connection failed”);
}
}
}[/code]
And this is the subroutine where to implement the different commands:
[code]void ListaComandi(int Ncmd)
{
switch(Ncmd){
case 1: client.println(“GET /command/?cmd=volume%20+2”);
client.println(“GET /index.php#playback”);
Serial.println(comando);
break;
           case 2: client.println("GET /command/?cmd=volume%20-2");
                   client.println("GET /index.php#playback");
                   Serial.println(comando);
                   break;

           case 3: client.println("GET /command/?cmd=next");
                   client.println("GET /index.php#playback");
                   Serial.println(comando);
                   break;

           case 4: client.println("GET /command/?cmd=prev");
                   client.println("GET /index.php#playback");
                   Serial.println(comando);
                   break;

         default: ;
         break;
        }
comando = 0;
}[/code]
:mrgreen: :mrgreen: :mrgreen: :mrgreen: :mrgreen:
NOTE:
Please have a look on arduino.cc where some portion of the above code are taken. Especially this: https://www.arduino.cc/en/Tutorial/WebClientRepeating
The serial print is used for debugging only, can be removed to save computing stress on arduino.
I’m now going to implement more buttons and functions and probably I’ll use a rotary encoder for the volume command.
Thank’s a lot for the cooperation!!

 but you could just get a small and cheap one with built-in wifi.

