I never managed to make it play via i2s and I did many tests (with a custom distro, not volumio).
Via xmos I tested various dsd files and it was OK.
Sent from my Oneplus One
I never managed to make it play via i2s and I did many tests (with a custom distro, not volumio).
Via xmos I tested various dsd files and it was OK.
Sent from my Oneplus One
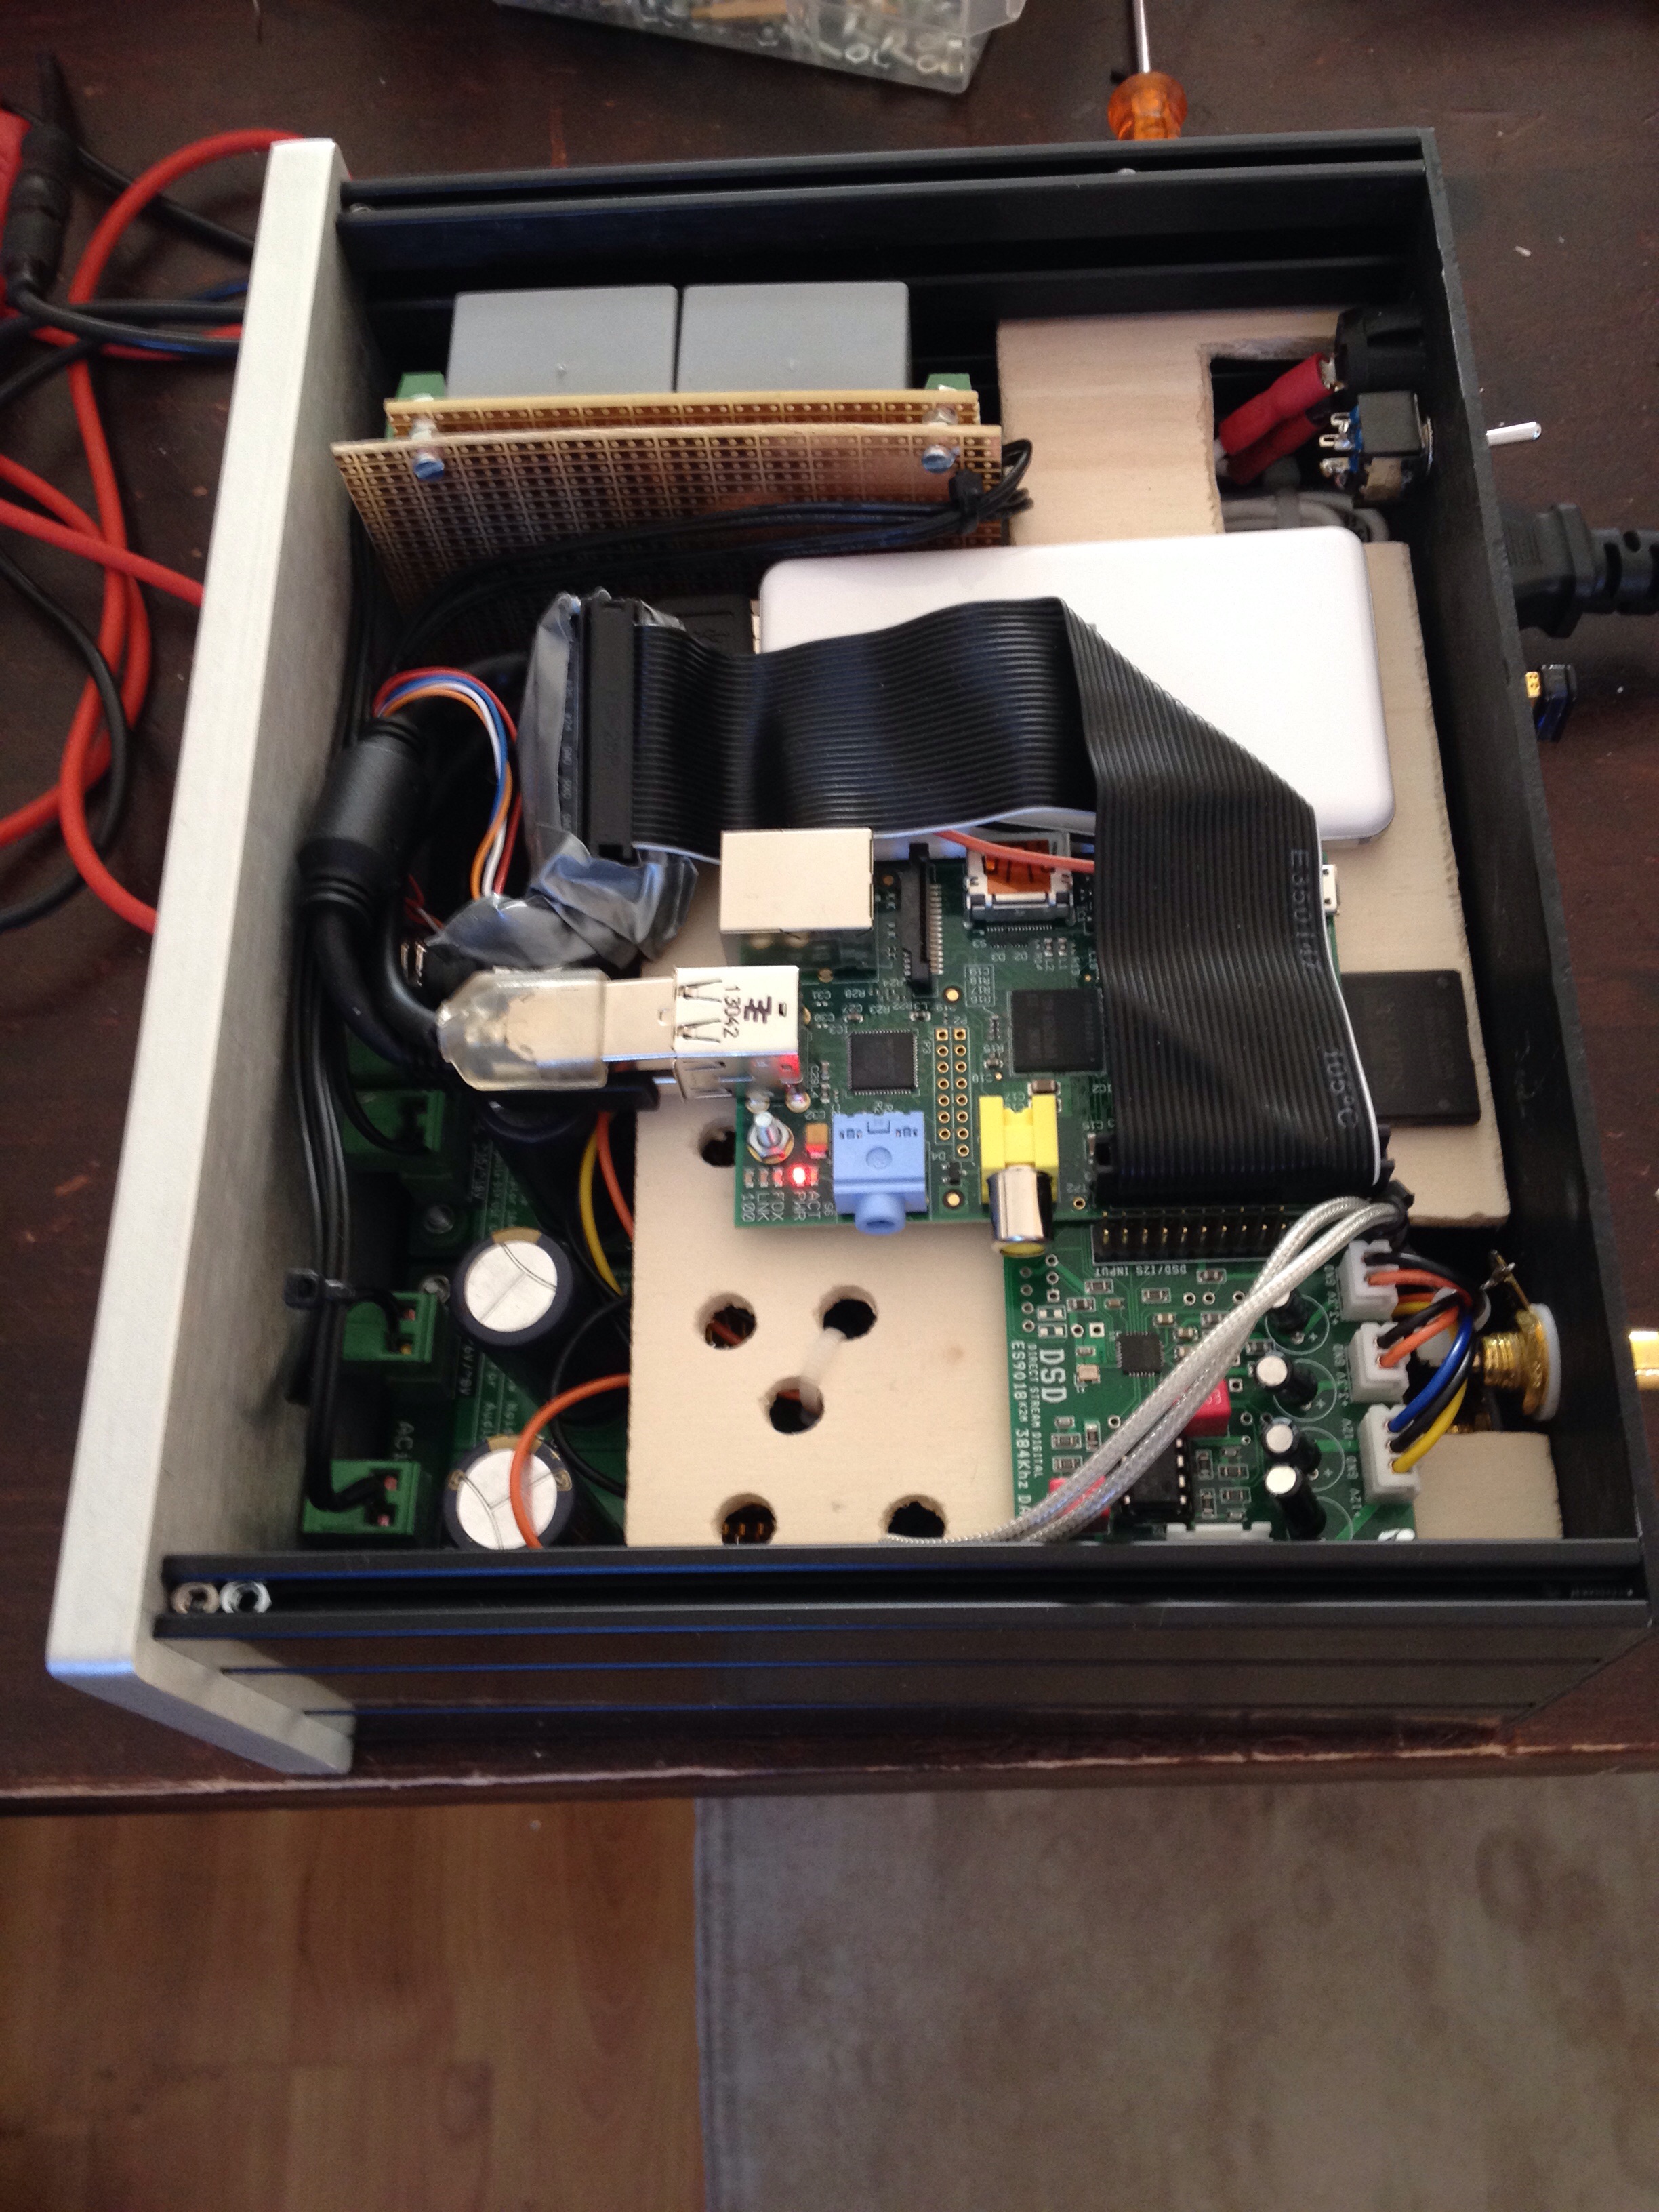
Tux - glad to hear you like the DAC. Do I understand correctly that you got the modified-for-volume-control XMOS board and have now ordered the non-modified, isolated board ($99)? If that’s what you’ve done I highly recommend trying the Hifiduino implementation. End result is exceptional value for money in that, if you already have the correct XMOS board and the K2M, the bits for the Hifiduino are well under U$50. Add a power amp and you have a complete one-enclosure music system. I’m now looking at 3D printing a small enclosure to house the LCD display, IR receiver and rotary encoder volume knob - the rest can be hidden away as all you need is to connect the speakers and plug into the mains (I use a wifi dongle to connect to the NAS on the network).
Now that Michelangelo has released 1.5 I am going to have another go at trying the Raspi/Volumio into the K2M via i2S although I suspect it needs an ESS-friendly driver so I don’t expect too much success.
I would be interested to hear your opinion on any sound quality differences between the two XMOS boards if you end up with both.
Yes I got the modified which I almost destroyed. I finally fixed it by removing a burned element and it plays again but I have also ordered the hifiduino compatible.
I am not sure yet if I will put a display. The only reason is that it is difficult to find or modify an enclosure.
I really like how this DAC sounds. It’s very analytical and detailed.
Sent from my Oneplus One
Yes, I agree, the K2M is a detailed, quiet DAC with great resolution.
Re the enclosure for the LCD etc, I downloaded the Front Panel Express software, designed a faceplate on the software that included an LCD cutout and holes for the rotary encoder and IR receiver. Exported the resulting file to .dvf (option on the FPE software) and emailed the file to a company that sells/engraves trophies. Their laser cutter easily produced a professional looking front plate - even engraved a logo for me - out of 3/16" tinted Perspex. Cost was very reasonable and it gives you the flexibility of designing front and back plates to fit almost any configuration or enclosure.
Signage companies can do amazing things with Perspex or aluminium. If there are such companies in your area it may be worth dropping by and asking a few friendly questions.
Hi
A nice guy called Toni, in one of the “DIY volumio projects” page #p8893 , managed to make ES9018K2M works with I2S to RPi volumio. You need to edit few files below.
== Quote ==
Volumio 1.4, 1.5 and 1.51 needs to be tricked to play music through the ES9018K2M. If you select a generic DAC driver, you cannot use it for audio output directly using the GUI.
I did apply the following settings to make it work:
File: /etc/modules
snd_soc_core
snd_soc_bcm2708_i2s
bcm2708_dmaengine
snd_soc_pcm1794a
snd_soc_rpi_dac
File: /etc/asound.conf
pcm.!default {
type hw card 0
}
ctl.!default {
type hw card 0
}
File: /etc/mpd.conf
audio_output {
type “alsa”
name “Output”
device “hw:0,0”
mixer_control “Playback Digital”
mixer_device “hw:0”
mixer_index “0”
dsd_usb “yes”
}
After that the I2S driver for the RPI-DAC can be used, and the audio output is set to sndrpirpidac.
bennyjo88, thanks for posting those tweaks for the K2M, I shall try them over the next few days and post results.
DerekB, I would like if you can try also dsd64 files without resampling
Leopoldo
Having issues with DSD files. Constant dropouts. They play fine through the K2M DAC when the transport is an Alix 2d2 running Voyage MPD but the B+/Volumio I2S out doesn’t seem to like DSD. The LCD indicates it is trying to lock to 384kHz and keeps flicking between that and 192kHz so it may well be a config issue. It should indicate DSD and 2.8MHz.
Rpi+i2s support up to 192.
Sent from my Oneplus One
 I can confirm that the described setup works perfectly. I just finished setting up my Volumio box with the ESS9018K2M and enjoying the music!
Hi Derek,
I am about to implement the hifiduino solution and I have one question with regards to the screen you used. I assume that using a 3.3V arduino you also bought a 3.3V display. Please can you give me a link of this product?
Thank you in advance!
tux - no I did not use a 3v3 display. Used a standard 20x4 HD44780 display from eBay. It requires 5V. As I was building a single-chassis that included the K2M, Hifiduino, Alix (or Raspi) and an amplifier module I had the power supplies for everything in the chassis. So I used the 5V power supply for the Alix/Raspi to power the LCD and the 3v3 supply for the K2M to also power the Adafruit Pro Trinket.
Am willing to help with any queries about the implementation. Blg Gear on the Hifiduino site is the best guy to answer Hifiduino questions but I will help where I can. Good luck with the project, it’s definitely worth it.
Thanks for your quick reply!
I have order a buono uno which can operate in both 3.3v and 5v and also two displays, one in 3.3v and one in 5v. I will test the 3.3v fist as want to avoid the converter.
In the next days I will start buying all the other needed components and I hope that I will have finished the project by the end of January.
Happy new year!
Sent from my Oneplus One
Hi Derek!
the arduino clone I bought (Buono Uno R3) needs 6V+ input voltage. Do you believe that the solution below will be ok for hifiduino implementation?
ebay.com/itm/LM317-Adjustabl … 4accba7d57
Thank you in advance!
Yes, that will work fine for powering Buono. It’s 1A max. output so probably better to use it only for the Hifiduino components - i.e not for powering Raspi as well.
Power the 5V LCD from the Buono’s 5V out if you can. Check whether the Buono’s 5V pin is still 5V after selecting 3v3. You only need the two i2S wires and ground from the K2M if you’ve connected the jumpers under the 20-pin connector on the K2M to send 3v3 and ground to the i2S output pins. If you’ve already soldered in the 20-pin connector then you need to run external ‘jumper’ cables on the back of the K2M board to the 3v3 and GND connectors as shown on BlgGear’s site.
Depending on what perfboard approach you are taking, suggest leaving room for an NPN transistor near the 5V to switch off the LCD. I will get around to implementing the code to turn off the LCD via the Apple remote or after a suitable few seconds - I find it gets a little distracting leaving it on permanently.
The 3v3 level issue only applies to the Arduino (Buono) and the K2M. Because the K2M is 3v3 the Arduino side has to be the same but the LCD can be 5V - just means you have to power it with 5V; it being 5V won’t interfere with the 3v3 level required by the K2M/Buono side of things.
Thank you very much for everything!
Sent from my Oneplus One
Does the new Rasperry pi 2 the same limitation? 
Leopoldo